Saturday, 17 February 2018

How To Get Your Whole Family Cleaning

Being part of a family or having one of your own is a beautiful thing. However, with family comes a lot of work in nurturing, caring and making the home as family friendly as possible. As a parent when your family is happy because they are living in a clean and conducive environment, you will this great sense of pride. However, doing it alone can be frustrating and not appealing at all. In fact, some parents have developed this sense of resentment towards their own family because they make great effort to clean and tidy up the home only to have everything undone. For that reason, it is important to get the whole family cleaning and tidying up.

A few ways on how you can get your whole family cleaning and tidying up your home are as follows:-

Discuss Why You Need To Clean Together

Related image

Have a family discussion and have everyone understand why it is important to live in a clean environment. Tell them how it requires great effort to run a home and how their help would simply things. Let everyone understand that they should work together to clean up their own messes for their home to be habitable and presentable to guests.

Focus On Important Areas Of Your Home

When establishing duties, consider the important areas of your home first. Give them the priority. You could decide to clean most of these areas yourself because they could be very crucial. Areas like the kitchen and bathroom require special cleaning for them to remain spotless and germ-free. Giving them to one of the children might not be wise. There is also the issue of safety. Areas that require deep cleaning on a regular basis will also need safety precautions in place when it comes to matters of using detergents and cleaning out the dirt.

Discuss What Everyone Likes

Related image

Have a talk with your family and let everyone speak out and say what they like cleaning the home. One family member will love cleaning the dishes, another will love doing the laundry and folding while another just loves cleaning the floors and tidying up. After everyone has spoken and you all know, the next thing will be allocating duties.  This way everyone will be happy because they will get a duty that they love doing.

Discuss The Difficult  Routines

This is also the time to have that talk with your family and let them know of the difficult chores. Discuss how you are all going to do the difficult tasks. If you are a large family, it could be wise if two or three people were assigned to handle the difficult tasks in turns. For example, if it is a family of eighteen members, groups of 6 could be created to help out with the difficult chores in turns. At the end of the day, you want to be fair and don’t want anyone feeling like they are doing too much compared to the others.

Change The Routines

Change is always like rest. You don’t have to stick to the same routine for months. Make changes here and there lest people in your family get bored with the same routine. If laundry is usually done every Friday and kitchen deep cleaning is done every second-week of the month, you could have the kitchen cleaning done on the last week and the laundry is done every Saturday or Mondays. Tweaking will also give members of the family an opportunity to interchange their duties. Everyone will get the opportunity to try out something new and they will all stay motivated and continue doing their share of cleaning the home.

Consider The Timing

When assigning duties, consider that every member has a life outside the home. It could be work, school, sports practice, concerts, shows, parties, sleepover and so on. Discuss with all the members of your family about how and when they are going to carry out their duties with their other activities outside the home waiting for them.  Let everyone tell you the times they will be free to help out. If it is evenings, weekend or any day of the week. Everyone has to help even if it is something as simple as tidying up or stocking the groceries in the kitchen.

For successful family cleaning, they all have to agree and set realistic cleaning goals. No one should be given workload that they can’t manage considering their schedules.

Hire Professionals Once In A While

You could decide to give your family a break and hire professional cleaners to come and do the job once in a while. This will give everyone a cleaning break that they will need. When they resume their cleaning schedules, they will all be rejuvenated and ready to continue cleaning.

Just make sure that you don’t hire professionals for too long and make everyone too relaxed and too reluctant to resume their usual cleaning duties.

Do reviews Together

Again sit everyone down and discuss their various departments.  Ask everyone how they feel and how they have been fairing on in their cleaning. Encourage everyone to raise complaints and propose ideas. When everyone is speaking out, issues will be solved. If there are people within your family using the bathroom badly for example or leaving their stuff lying around because they know someone else will tidy up, they could stop when such issues are raised. With regular reviews done and everyone speaking their minds, problems will hardly arise and the home will remain clean with everyone’s help.

The House Won’t Clean Itself

You can either decide to get your family cleaning or do all the work yourself. The fact remains that the home will not clean itself. It is up to you the parent to makes sure everyone feels accountable and responsible for the cleaning of the home.  After everything is discussed, booked and planned then everyone will know what to do. Remember to reward that childrn that faithfully do their duties to enourage more commitment.  Who knows, you might even get more time to pursue other passions and take care of yourself more.


The post How To Get Your Whole Family Cleaning appeared first on Cleaning Exec Cleaning Services.


from
https://cleaningexec.com/blog/how-to-get-your-whole-family-cleaning/

Stream Cleaning Versus Traditional Mopping – Which is The Best?

The debate on which is better between steam cleaning and traditional mopping still carries on homeowners are yet to decide on the best floor cleaning methods. They are both used to achieve the same results and that is cleaning. They are both so different but still the same in some aspect and they both have their pros and cons. Basically; steam cleaning uses electric energy while traditional mopping just requires physical energy. The debate about which is better off the two will continue since people have different preferences at the end of the day. Here is an unbiased review of both methods and from this review, you will able to determine which is better.

Traditional Mopping.

Image result for traditional mopping images

Mopping essentially requires a mop which is a simple tool that can be found in any household. A mop has a very high-water absorbance capacity and that’s why it’s still popular when it comes to washing floor. A bucket, mop, detergent, and water are what is required when washing a floor. Mopping can be tiring and time-consuming largely depending on the floor area. A mop is dipped into a bucket filled with water and detergent, then the mop is wrung out in sieve section in the bucket and then used to wet the floor. Wringing out the mop every time is rather a time consuming and monotonous. To add on that, you have to wait for the floor to completely dry before walking over it thus, making mopping more time-consuming.

Mops are very cheap compared to steam cleaners. Modern mops have different sizes and shapes, different types of mops include cut-end mops and looped yarn mops. Cut-end mops get deteriorated fast because they cut ends start fraying and get left on the floor. Looped yarn mops have a longer lifespan since they don’t get frayed.

Some key benefits of using traditional mop include and not limited to; traditional mopping is affordable. Cleaning using a traditional mop is a nice workout plan. Serious session of floor mopping can help you burn some calories. Some people really do enjoy the fresh scent left behind after cleaning. The fresh scent, however, depends on the detergents used. Nevertheless, mops are able to absorb liquid which is ideal especially when paper towels can’t do the trick.

Traditional mopping is such a satisfactory way of cleaning a floor however its inability to reach high temperatures makes it less effective and efficient. High temperatures are ideal to kill germs and bacteria that linger around on the floor.

Process of using a traditional mop

  1. Mix water and detergent in a bucket.
  2. Swirling the mop in water.
  3. Scrubbing the floor.
  4. Rinsing the mop.
  5. Wring the mop out.
  6. Empty the bucket.
  7. Rinsing the mop and put it away together with the detergents.

Process 2 to 3 are repeated severally for a large floor area.

Steam cleaning.

Image result for steam cleaning images

Since they were invented, steam cleaners have continued proving how reliable they are. They were designed to reduce the hassle of cleaning brought about by traditional mopping hence making cleaning less time-consuming. Steam cleaner uses only electric energy and there’s no monotonous wringing out.

Steam obtains very high temperature thus being able to kill almost 100% of germs and bacteria that exist on the floor surface making floor safer for children. Steam cleaners save you added expenses of having to purchase detergent or even a bucket making steam cleaners relatively economically friendly. Nevertheless, steam cleaners are way quicker than traditional mops and they barely leave any water behind hence the floor dries up really quickly. Steam cleaners are also able to remove hard stains on the floor thus saving you the effort of having to thoroughly scrub the floor to get stains from the floor.

The biggest disadvantage has to be the cost. Steam cleaners are expensive than traditional mops however a steam cleaner can be used to clean all types of floors. Steam cleaners are undoubtedly effective and efficient as compared to traditional mops.

Steam cleaners, however, don’t leave the cleaner with that satisfactory feeling and experience as compared to traditional mopping.

The process of using a steam cleaner.

  1. Fill the water reservoir.
  2. Attach the mop pad.
  3. Plug into a socket.
  4. Gently push the mop on the floor.
  5. Unplug the mop.
  6. Put the mop away.

Despite modern innovations of mops, the original rope mop still remains favorite for most people. For most people, they feel there is a deep sense of satisfaction when you dip a mop in water and push it around until the floor sparkles. For them, they feel they have done a very pleasing work regardless of the physical energy they have to put.

If you are super excited by the scent of a freshly mopped floor then the traditional mop would be your best bet.

Steam mop has made washing the floor much easier and less time-consuming. A steam cleaner is an all-inclusive tool that just needs to be filled with water and plugged and then you are ready to make your floor clean. If you are used to traditional mopping, a steam cleaner will make you feel like you haven’t really done a good job since you are likely not to experience any physical exertion.

When it comes to traditional mopping, you have to put some factors into consideration. There is an added cost of detergent, bucket, maybe a brush and more time. More time is consumed depending on the area to be covered. With steam cleaners, the only cost incurred is the initial fee for purchasing the tool. From there on, it’s only a matter of filing the tool with water and monitoring the cost of electricity used.

The debate about which is the best between steam cleaners and traditional mopping boils down to the benefits offered by those two. In this review, the advantages and disadvantages of both have been laid out and steam it’s really up to you to choose the one which works best for you. Some people do employ both techniques. So, which is best? That is for you the homeowner to figure out depending on the needs of your home.


The post Stream Cleaning Versus Traditional Mopping – Which is The Best? appeared first on Cleaning Exec Cleaning Services.


from
https://cleaningexec.com/blog/stream-cleaning-versus-traditional-mopping-best/

Top worse food stains and how to remove them

Where two or three are gathered, like some unwritten rule, food seems to get all over the place and food stains seem to rule. There are measures you can take to keep your linen from getting food stains. For instance, you can wear an overall, use a napkin or eat naked (is even an option?). Though the road of cautiousness is a tricky one to take considering the other responsibilities in your hand. Besides, you should live it up always because truth is, it is the youngest you’ll ever be. But as much as you only live ones, guess who is going to do the washing?

You don’t want to spend an impressive three hours just working on  food stains. Or throwing the fabric away because of a stubborn stain, unless you are a Bill Gates or a Kardashian of course. Therefore, if you are a messy eater, don’t worry we are going to get along just fine. There are ways you can get smarter than those stains trying to sabotage your life every time you are having a moment. Some stains are tougher than others to get off. Here are some of them and how to deal with the stains.

Coffee and tea stain

Image result for coffee stain images

It is all too easy to get a tea or coffee stain on your cloth. I can think of hundreds of ways your fabric can get stained. The best way to deal with it is to act on it immediately. But unfortunately, most of the time the setting doesn’t allow us to remove the cloth. Once they set, that’s when you start searching online for ways to quit coffee or tea. Well, the struggle is real but you can still have your cloth spotless again in no time. If the stain is old and set, soak it in warm water with detergent. This will loosen the stain as you prepare to launder. But if the stain is stubborn, mix a teaspoon of vinegar or baking soda in a few cups of water, then pour the liquid over the stain. Then, gently blot the garment and you will see the stain lift. If the stain is fresh, just pour warm water directly through the stained part of the fabric. Then launder with a detergent or dishwashing soap.

Chewing gum stain

Image result for chewing gum stain images

Chewing gum is not everyone’s thing, but who minds when you do it? (for 21st century’s sake, don’t chew it barbarically). Gum can be relaxing and reduces boredom, until oh boy, you somehow see it on your fabric. When this happens, don’t try pulling it away, this will only lead to a greater mess or your fabric getting torn. Instead, use the easiest and most commonly suggested method of removing the chewing gum stain—freezing. Keep the cloth in a freezing bag, then place it in the deep freezer for a minimum of two hours.

Then remove the bag and remove the gum immediately before it warms up and reattaches itself. We, of course, can’t assume everyone has a deep freezer. You can also soak the cloth in lemon juice and scrape off the gum with a blunt edge. It is advised, however, you wash the garment immediately. You can also spray the garment with hairspray, this will harden the gum then scrape it off. Soaking in hot vinegar is also an option.

Red wine

Related image

We have all been there, where you are having a special dinner or moment, then the red wine stain happens! Immediately it occurs, consider containing it from spreading any further. Gently dab on the cloth, to get the excess liquid off but do not rub. Immediately apply salt or baking soda to soak up the excess liquid and prevent it from soaking up. After the salt application, rinse the stain in equal amounts of white vinegar and dishwashing soap. You can also pour white wine, only to neutralize the effect if you are in a public place. Then launder and treat as usual.

Olive oil

Image result for olive oil stain images

You think oil poses only a risk to your health until it finds its way into your fabric. Olive oil stain is not as obvious and bright as tomato paste, but no less irritating when you see the darkened spot. Start by removing any excess oil with a spoon or dull knife. Next, apply liquid dishwashing soap until it soaks to the other side. Then allow the liquid to sip throw the fabric, this will break down the oil. The wash in as warm water as the fabric allows. Check whether the stain is gone before drying.

Tomato sauce


Image result for tomato sauce stain images

Here is the drill when it comes to tomato sauce stains: do not use hot water. This is because heat sets the stain permanently. Whether tomato ketchup or fresh tomato juice, they bring such life to food but also brightly stain your fabric. Remove the excess tomato sauce stain from the fabric. Then run cold water on the stain through the back of the fabric. Next run dishwashing soap on the stained part of the fabric. If the fabric is white, you can bleach it. Add some detergent and launder as usual. However, ensure the stain is totally gone before drying it. If you get a cooked tomato stain though, consider it is oil tomato stain you are dealing with. Start treating the oil by using the dishwashing soap.

Berries

Blackberries, blueberries, raspberries, cherries, cranberries, and strawberries are undeniably nutritious and delicious, yet cause stubborn stain if spilled on your fabric. Simply treat the stain by using equal amounts of dishwashing soap and white vinegar. Rub the mixture on the stain and leave it to soak for about 15 minutes. Next, launder as usual. Just like with tomato sauce stain, bleaching the fabric is a good choice.

Baby food

Related image

If you have a baby, baby food stains are a guarantee. There is a variety of baby food but basically, scrape off the excess food. Then pretreat it with a stain remover that best suits the fabric. If the stain has set, you can use alcohol-based cleaner, after soaking for a few hours.

There are many food stains and majority have been featured on the above list.  Now you know how to handle them.

The post Top worse food stains and how to remove them appeared first on Cleaning Exec Cleaning Services.


from
https://cleaningexec.com/blog/top-worse-food-stains-and-how-to-remove-them/

Thursday, 8 February 2018

Uses Of Salt At Home That You Don’t Know

We mostly know salt as an awesome and vital flavor enhancer and a preservative from the dark days till now. But do you know you can use salt in a myriad of ways to solve common cleaning issues at home? To date, no other seasoning has satisfactorily replaced salt. It is amazing how much wonder salt can do yet it is crazily affordable. Salt solves many common challenges at home and also proves to be economical and environment-friendly, compared to products manufactured to solve the same issues. In fact, by the time you finish reading this, just like me, it will be your favorite ingredient. Here are various ways you can use salt at home:

  1. Dental hygiene

Related image

Whether you have run out of toothpaste or just trying out on something new, the salt will work just fine. It is of course, not a replacement for toothpaste, but when used with or without it, solves major issues. A saltwater mouth rinse is a great option for anyone who has gum sores, sore throat or recently had dental procedures. What salt does, it temporarily increases the pH balance in your mouth, creating an environment where bacteria struggle to survive. If you are struggling with bad breath, gargling the salt rinse will help keep your mouth odor-free. It can also brighten up your teeth when you mix it with baking soda.

  1. Fruit prevention from browning

Image result for fresh apple sliced images

When apples are cut and left, they turn brown. This not only makes them look less appetizing but also their flavor and other attributes get altered. There are other methods too, like using lemon juice and honey for preserving them but using salt water is a better way. Only use half teaspoon of salt in one cup of cold water and let the fruit soak for 10 minutes. When you want to eat the apple, you can quickly rinse under cold water to remove traces of the salt on the surface.

  1. Cleaning the sink drains and kitchen

Salt can be used as a nontoxic, natural sink cleaner. You probably have manufactured supplies for your cleaning, but consider how eco-friendly salt is. The combination of salt and vinegar in boiled water will cut through tough clogs, especially through grease. Although the acidity of vinegar helps to eat through the clog, salt alone can be effective. Measure a half cup of salt, then pour it directly into the drainage. Slowly pour hot water down the drain. Since you are using salt alone, you may consider repeating the process severally.

  1. Stain removal

Image result for salt on stain images

In removing stains, you need all the help you can get. Salt is there to help. If you have a fresh grease stain, remove it by covering it with salt. Allow it to absorb the grease then brush it away. Repeat until the stain is gone. You can also remove fresh blood stain by covering it with salt, then blot with cold water. You can also remove wine stains by sprinkling stained area with enough salt to soak up liquid. Soak the fabric for about an hour then launder as usual. Additionally, in the process, it brightens the color of your faded cloth.

  1. Exfoliating the skin

Image result for salt on skin images

Salt is not only a skin exfoliator but also a natural detoxifier since the salt absorbs the toxins from the skin. To be specific, sea salt is best used. The important difference between sea salt and table salt is that sea salt has higher levels of naturally occurring minerals. Dead skin results in an old and tired looking skin. Exfoliating using salt is an excellent and skin-friendly way to shed the old skin. Make a paste of sea salt and water then apply it on your face. Leave for a minute before you get into the shower and massage the salt off gently as you bath. Amazingly also, sea salt’s high magnesium content makes it a powerful anti-aging weapon.

  1. Burn and itching remedy

Image result for salt on itchy skin remedy images

Although an itching skin is not a death sentence, it can be crazily irritating, depending on the severity. The causes can be allergies, insect bites, burns or a brush with poison ivy. There are definitely, a variety of products manufactured to treat the condition, but you might consider doing it naturally since you have everything to gain and nothing to lose. To relieve a bee sting, immediately wet the spot and cover with salt. In treating poison ivy, soak the exposed part in warm salty water to help hasten the end of the poison ivy irritation.

  1. Extinguishing grease fire

Image result for grease fire images

There are a number of ways to put out a grease fire, and using salt is one of them. Have you ever experienced a small grease fire, whereby, little oil spills on the skillet and the pan goes in flames? The most important thing to remember, when it occurs, don’t use water at any cost. Simply look for ways to cut away oxygen. Damp a lot of salt on it. Also never, ever use just any kind of pressurized fire extinguisher on grease fires because you might make it worse. Salt is very effective in this case.

  1. Keeping cheese fresh

Related image

I seriously doubt if anyone uses their whole block of feta cheese at once unless they have guests. You will need to store the piece that remains for future use. But this is what you should not do, wrapping it up and tossing it into the fridge. This is because when the cheese is exposed to air, it starts to dry out and the flavor becomes sharply soar. Instead, you should store it in a paste called brine. Which you can easily make at home. Simply mix two cups of water with two tablespoons of salt. Ensure the leftover is covered fully in the mixture. This not only preserves the cheese but also gives it the salty flavor punch.

  1. Hand deodorant

Related image

Salt can greatly act as a deodorant. Seriously, who would want to walk around with hands smelling of garlic or some other foul smell? You are right, no one. If you don’t have other products, you can simply take a salt and vinegar then rub the mixture in your hands to remove the odors.

  1. Preservation Of Food

Image result for meat preserved in salt images

You can use salt to preserve fish or meat if you don’t have a fridge or in case the power lines are down and your fridge will not work for you.  Salt keeps the bacteria that causes beef or fish to go bad from thriving.

The above are the uses of salt, consider using them in your own home and you will be grateful you read this article.


The post Uses Of Salt At Home That You Don’t Know appeared first on Cleaning Exec Cleaning Services.


from
https://cleaningexec.com/blog/uses-of-salt-at-home-that-you-dont-know/

Saturday, 3 February 2018

Tips on how to clean glass furniture and mirrors in your home

It is almost unfathomable to have a house without any glass surface and a mirror. They make your home look trendy in a sparkly and beautiful way. Glass furniture and mirrors are the oldest accessories in the book but can never lose their charm because they effortlessly have the power to transform your house into something heavenly. But this only happens if they are gleaming and well taken care of.

Glass and mirrors easily attract dirt, dust, and scratches. Well, that may not be the salient issue since almost every surface behaves similarly, cleaning it is the tricky part. Most people think they know how to clean these surfaces until they spend hours with spray bottles cleaning only to end up with lint and streaks. Thatby the way, catch the light perfectly which is unsightly and off-putting. You are in luck, for it doesn’t have to be that way anymore. There are ways that will ensure you get the surface that gleams as good as new. Here is how:

Check for stains

Image result for cleaning stain on glass table images

Just like in laundry, you will get better results if you deal with existing stains before you generally clean the glass or mirror. From top to bottom, scan for stains as you clean them out. The best way to do it is by using rubbing alcohol on a cotton pad then rubbing them off. Running alcohol works like charm on any stain on your surface, from coffee to salad stains. And try working fast to avoid more staining when the rubbing alcohol dries. If there is a waxy stain on the glass, simply mix two cups of water, a half cup of dish soap and a quarter cup of vinegar. Moreover, if you have a cloudy surface -especially on glass- use half a cup of rubbing alcohol, a quarter teaspoon of liquid dishwashing soap and two tablespoons of ammonia. Apart from stains, consider wiping the dust off to prevent moving it around the window as you clean.

Clean in a zigzag manner

Related image

Starting from top to bottom from the corner of your choice, work in a zigzag style. People refer to it in different names, but the bottom line for using this pattern is to ensure that no part of the surface is left unattended to. As you spray your mirror or glass furniture, if you are using soap, minimize on the suds. Going excess on the cleaner will not only give you a hard time cleaning it away but also leave streaky residue on the surface. This is not the only pattern you can use, you can also decide to go circular then horizontal and vertical. Though of all, the zigzag pattern has a better accuracy.

Use Vinegar

White or distilled vinegar is one of the  staple cleaning products in your home that can work wonders on your glass and mirrors as well as it does in your salad. Vinegar has the benefit of being our natural which goes a long way in preventing streak while cleaning. When you mix it up with other solutions such as water and dishwashing soap, it makes a magical solution. If you have run out of your normal glass cleaner or just want to confirm if the word is true, you will soon be among those who testify of the wonders the concoction does. You can also add rubbing alcohol to the mixture do help in drying and luster after cleaning. A tip: If your windows are extra dirty, directly spray with white vinegar and let it sit for a while.

Get A Microfiber Cloth

Woman Cleaning a Window

Using paper towels is the most common and accepted way to get the job done, but considering the number of paper towels you are going to roll out, there must be an alternative. Yes, there’s another way and that is using a microfiber cloth. It is the easiest and cheapest effective way to clean your glass and mirrors. Considering they are reusable for a long time. When you go back to the past when there wasn’t any chemical cleaning glass, microfiber cloths came in handy. All they did wash damp the cloth and get a streak and lint free shine on any mirror or glass. You might as well pick it up. It makes cleaning your surface so simple. The fascinating aspect of the cloths is their ability to remove and hold dirt. As you are at it, avoid too much force or abrasive things that may scratch the surface. Additionally, tiny scratches on your glass can be polished by using little white toothpaste.

Clean Edges With A Cotton Swabs

Most people leave out or don’t concentrate much on the edges. It might be probably because it’s pretty hard to get the dirt from the corner, or simply because who will notice it anyway? For whatever reason, there’s a simple way you can get the job done: by using cotton swabs or even a smooth toothbrush. It helps clean quick and with less effort on your part.

Buff the surface

Like some unwritten rule, no matter how thorough you were, there’ll be a streak or two. That is what buffing your surface takes care off. A microfiber cloth can do it, as well as a newspaper. Ensure they are dry and just buff over the glass. When cleaning, try to work fast in order to prevent too many streaks. If possible, wipe as you dry the cleaner. It also advisable to dry the outside of the window in one direction and then inside in another. This makes it easier to find and rid the streak.

When using water for cleaning your glass furniture, ensure it is distilled. Otherwise, tap water has dissolved minerals that cause the undesirable streak. As you have already figured out, residue and streak can be frustrating, so you do everything to avoid such. Well, the sun may prematurely dry the surface cause the effect you don’t want. Therefore, if you can, try cleaning the glass and mirror surfaces in the morning or during cloudy days. To save you the trouble. A tip: to give your mirror a nice luster, wipe with rubbing alcohol after cleaning.


The post Tips on how to clean glass furniture and mirrors in your home appeared first on Cleaning Exec Cleaning Services.


from
https://cleaningexec.com/blog/tips-on-how-to-clean-glass-furniture-and-mirrors-in-your-home/

How To Hand Wash Clothes Without A Washer Or Dryer

Modern technology is the mother of a lot of marvels today such as the machine washer and dry-cleaning machines. These have been used for more than a century now and are basic parts of our lives – helping to wash our laundry, keeping us clean and tidy.

But what if our machines just disappeared? It is imperative to know how to hand wash clothes since you might need the skills when you are in an area with no power or machines. Jungles, forests, camping grounds are just some examples of places you might need hand washing skills.

  1. First Fundamentals

Image result for soated dirty laundry images

Before you embark on hand washing, you will need to gather all your dirty clothes for cleaning. Then you will have to inspect the cloth tags on the back of the neck (for upper body clothing) or the small of the back (for abdominal clothing). These tags will have information on whether it is okay to hand wash the specific cloth or not.

After you have affirmed that the clothes are hand washable, you will have to separate the white clothes from the dull colored ones. This is because some dull colored clothes bleed dyes which can permanently stain your white clothes. You can still whiten your white fabrics but that is a topic for another day.

  1. Gather your Tools of Trade

Image result for large laundry tub with clothes images

To hand wash effectively, you will have to find a large spacious tub, preferably plastic ware to soak and wash in. Also, you will need a bar of soap and a powder or liquid detergent to help soften the dirt. You will then need water. Water from natural sources is too full of minerals, it will be hard water which is really hard to lather, and may stain clothes with the scum formed.

You can boil such water to reduce the mineral content in the water or use tap water which is already treated. You will even need more plastic tubs to rinse your clothes in. Also make sure you have a ready hanging line in place, for your clothes to dry on.

  1. 3. Soaking

Image result for soaked clothes in a tub images

Soaking helps dissolve fats, greases, and dirt from the fabric. It also softens clothes so that washing will be much easier and you will not have to use too much force such that you damage the fabric. Remember to straighten the clothes to allow water to permeate the fabric and soften out dirt.
Also during soaking, separate heavy and light clothes.

Do not keep your laundry soaked for too long in soapy water since this might damage your fabrics.

  1. Cleaning

For the lightest clothes, handkerchiefs, and wiping clothes; they can be disinfected by boiling them. For other clothes, use detergent to clean them. Smother them with soap then hold a random part of the cloth with both of your hands. Move your hands in opposite directions to each other as if to tear them but with much lesser force. Do so quickly.

The dirt will come off and the brightness of the fabric will increase as the fabric gets cleaner. If the soaked garments start producing bad odors, you can use vinegar to purge the smells. For the heavy garments, place them on a surface and scrub the dirt off with a brush.

Otherwise, you can use a toilet plunger to agitate the heavy clothes and make the water remove the dirt. The plunger works like an agitator in a washing machine making your work easier.
Avoid washing silk garments that are brightly colored or patterned since they may bleed off dyes permanently marking other clothes. Rinse the washed clothes then repeat again for maximum effect. As a bonus, you could reuse the water to wash the second batch of clothes, with no additional detergents.

  1. 5. Drying

Related image

After washing your clothes, you will need them dried. You can dry them without using a drier. For a quick drying method, use a thick fluffy towel. Place your damp cloth on the towel then wrap your towel all over it. Then wring the towel with the cloth in it. The water will be held by the towel and the cloth will have lost most of its water. For tough clothes, you can just force squeeze them until most of the water is gone.

You could also let the clothes air-dry out in the sun, hanging on a drying line. The sun is even better as the light rays from the sun will kill any bacteria left in the fabrics. It also restores fabric strength when the clothes are exposed to sunlight for a considerable amount of time. However, when left out for too long in the hot sun, fabrics will degrade, so beware.

  1. Tips

Don’t leave colored clothes out for long, they will fade very quickly. Also, using soft water, such as drinking water might save you time when hand washing clothes than using hard water (water from natural sources). Soft water lathers too easily making it the best for washing.

Use mild detergents when hand washing, since stronger detergents will damage your hands. Lingerie, handkerchiefs and light clothes should be washed first as they require least effort. Heavy fabrics such as denim can damage hands when washing. If they are too dirty, then using a plunger to agitate them is the best way to wash them.

Vinegar can be added to aid in cleaning clothes.

Using pegs will help keep clothes anchored on the drying line and prevent hostile winds from carrying them away. For maximum sunlight effect, you can place your wet clothes on a clean surface outdoors and they will dry twice as faster than on a drying line.Clothes that have been dried using the towel wringing method will require ironing since they most likely have a lot of creases on them.

Dispose your used washing water away from healthy plants as this water might poison them. For shoes, hang them upside down to dry quickly. Also, make sure all clothes are in their inside-out format while hanging them. This is because some of them might fall later while picking and it is better to get the inside surface dirty than the outer one.
If properly done, hand washing is more of a thrill than work. Have fun.

The post How To Hand Wash Clothes Without A Washer Or Dryer appeared first on Cleaning Exec Cleaning Services.


from
https://cleaningexec.com/blog/how-to-hand-wash-clothes-without-a-washer-or-dryer/

How to Get rid of Cigarette Smoke Smell in Your House

It could be you love smoking cigarettes while seated at your favorite couch as you watch your favorite show, or maybe it could be you just moved into a new house and the previous owner was a heavy smoker, either way, the smell of cigarette in a house is something to reckon with. Cigarette smoke is something that you can’t get rid off that easily.

Unless all your guests are smokers, it can feel quite embarrassing having guests coming over when smoke smell thoroughly engulfs your home. There is an endless array of solutions of solving this kind of a menace. These solutions range from avoiding smoking inside your house to smoking near a window. Still, the smoke smell can persist. Here are some great methods to completely get rid of that annoying smoke smell.


Start with the fabric.

Image result for curtains and carpet images

As cigarette smoke rises up it diffuses with air and finds its way to any fabric in your house. It settles on curtains and even on your clothes and books. Even when you are not smoking, you can be sure that your house will have that nauseating cigarette smoke smell. It gets worse when you open your window and the wind blows your curtains. The smoke smell then becomes increasingly notable. The best way to deal with this is by washing your curtains and clothes with detergents. Hand wash or machine wash, either can do the trick just perfectly. But just to be sure, check on the fabric for the washing guidelines given.

Mirrors and glasses do attract smoke.

Image result for smoke on glasses and mirrors at home images

Virtually everything in your house attracts smoke and that’s why your house will ooze smell of smoke every time. A thin residue of smoke is left behind on the glasses and mirrors. The residue is too thin to be seen. On a typical sunny day, the thin film of residues gets heated up making your room smell smoke. If you often smoke while your windows are closed then you can be sure your glasses have attracted a lot of smoke residue. To rectify this, spray the glasses and mirrors with white vinegar. Using a paper towel, gently wipe the glasses and mirrors.


Work on your carpet too.

Getting rid of smoke smell in a house isn’t a one process kind of thing. It takes several processes and activities to make your house have an inviting fragrance. Carpets do absorb smoke smell as well and if you have a carpet then you should clean it regularly. If by mistake cigarette ash falls on the carpet, it will absorb the odor thus changing the smell in your house. You need to have your carpet cleaned and you can opt to have it taken to professional carpet cleaners or clean it yourself. During carpet cleaning, remember to use the right detergents.

Don’t forget the walls and ceilings.

Smoke is not visible but it will find its way and settle on just anything. It settles as a thin residue film and this film is actually responsible for the smoke smell in your house. Deal with smoke residue that has settled on walls and ceilings using paint. If you are willing to spend a few cash here and there, you may consider the option of repainting the walls and ceilings. A new paint mixed with sealing primer will cover the old paint thus keeping the smoke smell covered. Alternatively, you can use cleaning detergents that contain ammonia. However, it’s advisable to try these cleaning products on small areas to test the impact they will have on your wall.


Time to install an air purifier.

Image result for air purifier images

Air purifiers work exceedingly wonderful when it comes to getting rid of the smoke smell or even dust smell in your house. These devices get rid of any contaminant that may be lingering in the air. When you install such a device in your house you can rest assured that even after a smoking session in your house, you won’t have to feel bothered by the smoke smell. This technique when integrated with the other methods discussed herein will work exemplary very good. With this device, you can very happily kiss constant smoke smell goodbye. However, remember to check the manual guidelines when you purchase this device.


Empty the ashtray immediately after smoking.

Related image

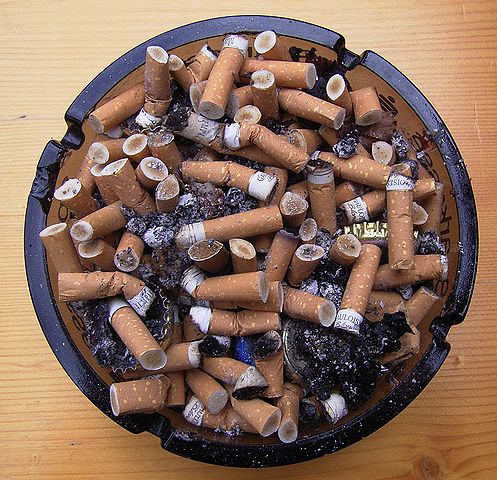
Ashtrays and cigarette leftover pieces should never be left to stay in the house for lengthy periods. Ashtrays and cigarette pieces are heavy contributors as to why your house maybe smelling cigarette smoke. It is very advisable to empty and clean your ashtray immediately after a smoking session. It’s also recommended to wash clean the ashtray after emptying its content. This is because the smoke smell will still remain in the ashtray hence your house will still have that smoke smell.


White vinegar.

White vinegar produces excellent results when you want to eliminate bad odor in your house. White vinegar doesn’t really have a great scent but it eliminates the bad odor that lingers in your house.  Put white vinegar in a bowl and leave it in the room for a few hours. You will be able to notice a great deal of difference afterward. One advantage of using white vinegar is that its scent doesn’t linger behind even after taking the bowl out.


Wipe all surfaces.

Image result for clean home surfaces images

Smoke residues will settle even on hard surfaces such as the floor or even on the tables. Surfaces of table end up smelling cigarette even when there is no cigarette or ashtray on the table surface. Use ammonia or white vinegar to thoroughly clean surfaces of tables or even drawers.

These tips work great when they are integrated together. Prevention will always be better than cure, smoking outside will save you some troubles; however, everyone has their preferences. Nevertheless, always ensure your house is properly ventilated. This will not only get rid of smoke smell in your house but also eliminate other bad odors that may fill your room. These tips are easy to implement and if you put dedication and determination you can be sure that you will reap very good results.

The post How to Get rid of Cigarette Smoke Smell in Your House appeared first on Cleaning Exec Cleaning Services.


from
https://cleaningexec.com/blog/how-to-get-rid-of-cigarette-smoke-smell-in-your-house/