Tuesday 24 April 2018

Water Saving Home Devices That You Can Install Yourself

In recent times, research has shown that water consumption in households has really sky-rocketed. The impact of this is something to think about and get worried about as well. The amount of water that goes into waste commands a great ratio. Nevertheless, the more water consumed the higher the water bill. Water is such a necessity that can’t be forgone at all, but there must be measures to ensure that water is consumed without waste.

Climate changes have become inevitable recently and with droughts looming for long periods, water conservation has to be embraced. Well, water conservation has to start at your home. There are various devices that you can install in your home to aid you to save a tremendous amount of water. You don’t really require to call in a plumber to help you install these devices. Have a look at some of these devices.

Adopt dual flash converters.

Image result for dual flash converters images


A lot of water is consumed in the toilet, accounting for almost 30 percent of the water consumed in most houses. The amount of water used to flash your toilet needs to be regulated if you intend to cut down on your monthly water bill. The best way to achieve this is to acquire a dual flash converter. This device is very significant. Its significance comes the fact that it releases a different amount of water depending on whether one has gone for a short call or long call. Normal toilet flash releases the same amount of water thus a lot of water will go to waste when one has simply gone for a short call. To install this device, you will need to replace the old mechanism which includes the actuator and the flush lever. But first remember to turn off the water supply and ensure the water tank is empty.


Tanks to store rain.

Image result for home water storage tank images

During the rainy season, you can actually harvest a lot of water that you can use to cut down your water bill expenses by a great margin. All you need is gutters and a tank or barrel that can hold a great amount of water. Connect the gutters to the roof. Place the tank in a suitable place where water from the gutter can easily drain into the tank. You can use this water to water your flowers or even clean your compound. If you have a farm, this technique will undoubtedly come in handy.

 Efficient showerheads.

Image result for showerhead images

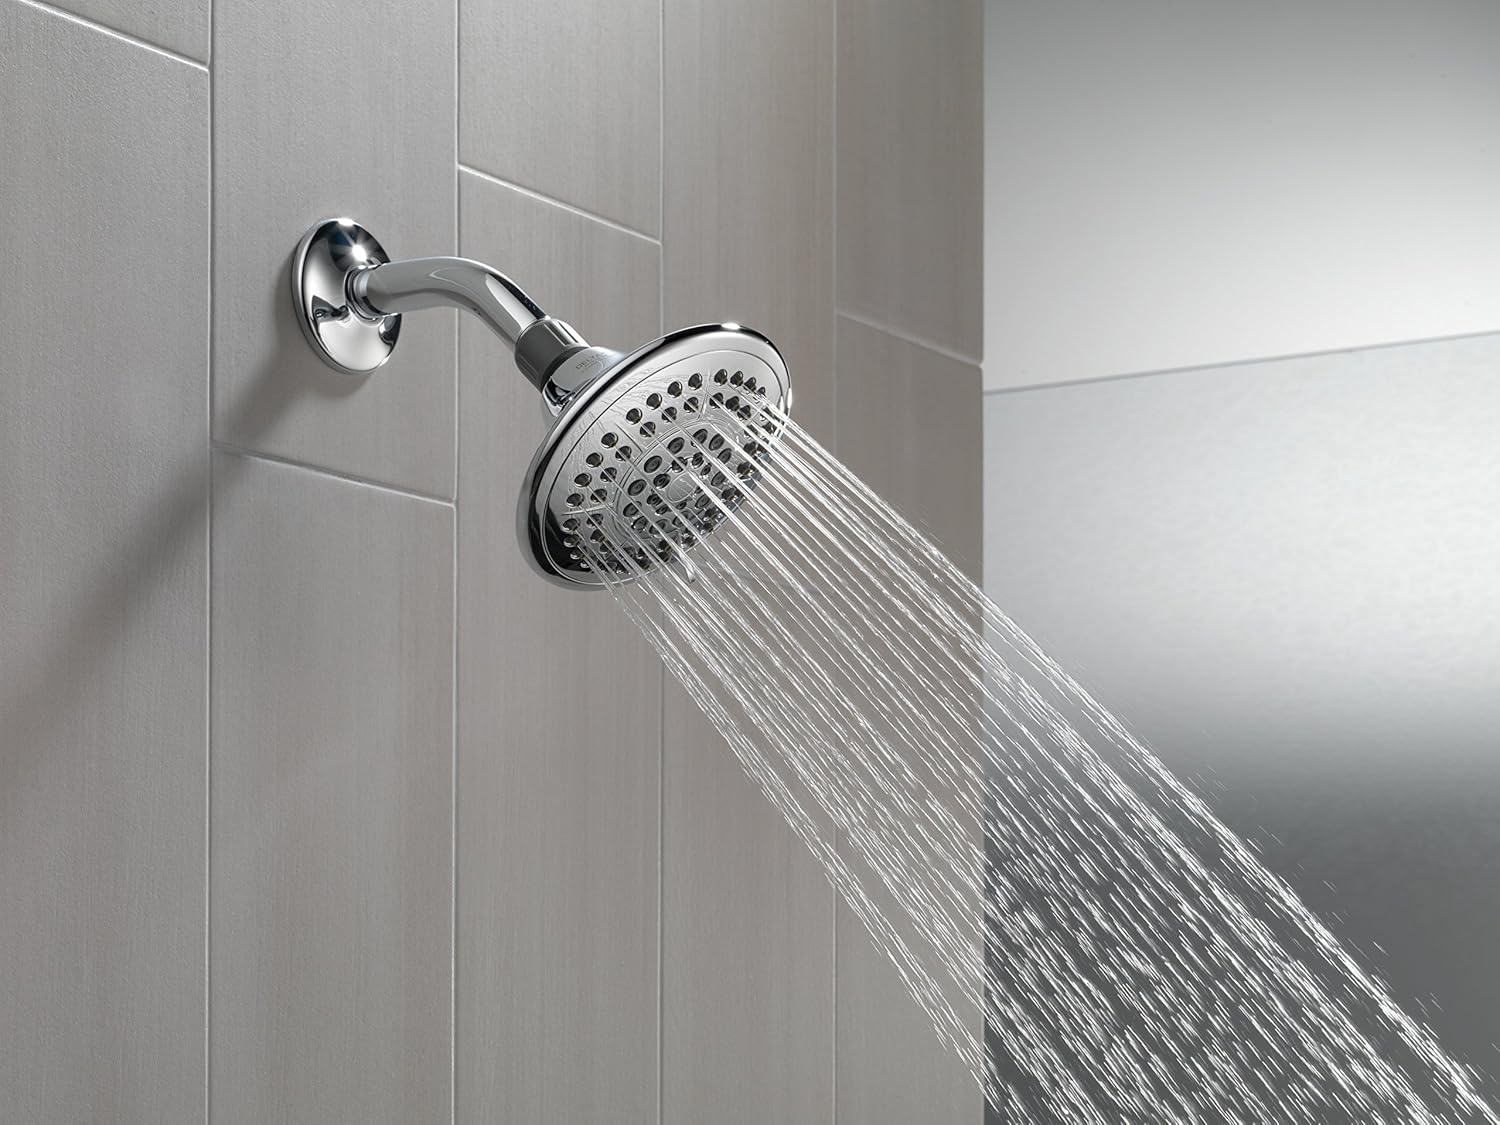
Well, you will be surprised by how much water you use annually to shower. This is one of the major reason you get surprised when you receive your monthly water bill. A lot of water is wasted in the showers daily mainly because of the showerheads installed. If you have less efficient showerheads you can be sure that your water bill will always be expensive. To save yourself some extra coins and gallons of water, you will need to purchase a low water showerhead. To install the new showerhead, simply remove the old by unscrewing it and it will be all system go. If there is any debris in the water pipe, remove them before installing the new showerhead.

Faucet Aerators.

Image result for faucet aerators images

These devices can easily be purchased from your local store and you will be marveled at the great difference they make. The standard faucet has a big share in the water that is wasted daily in a house. Having an aerator in your faucet turns around this fact making you save a great deal of water. Replace the standard faucet with an aerator that has low flow but it’s very efficient. An aerator is also used to increase the water pressure as it comes out of the tap.  If you have children who like to unnecessarily use a lot of water as they wash their hands, you really need to install this device in your taps.

Shower timers.

Image result for shower timers images

It is already established that a lot of water is used in the shower by on a daily basis. Some people tend to take too long in the shower and the impact of this is that a lot of water goes to waste. It could be hard to determine how long one should take in the shower but due to extravagant bills, you will need to be mindful of the time you take in the shower. The best thing you need to do is to acquire a shower timer and install it in your shower pipe. This is an advanced technology that estimates the amount of water any individual should use when taking a shower. If you happen to take too long in the shower, this device will sound you a warning. If you are disciplined you will save a lot of water in your house.


Greywater diverters.

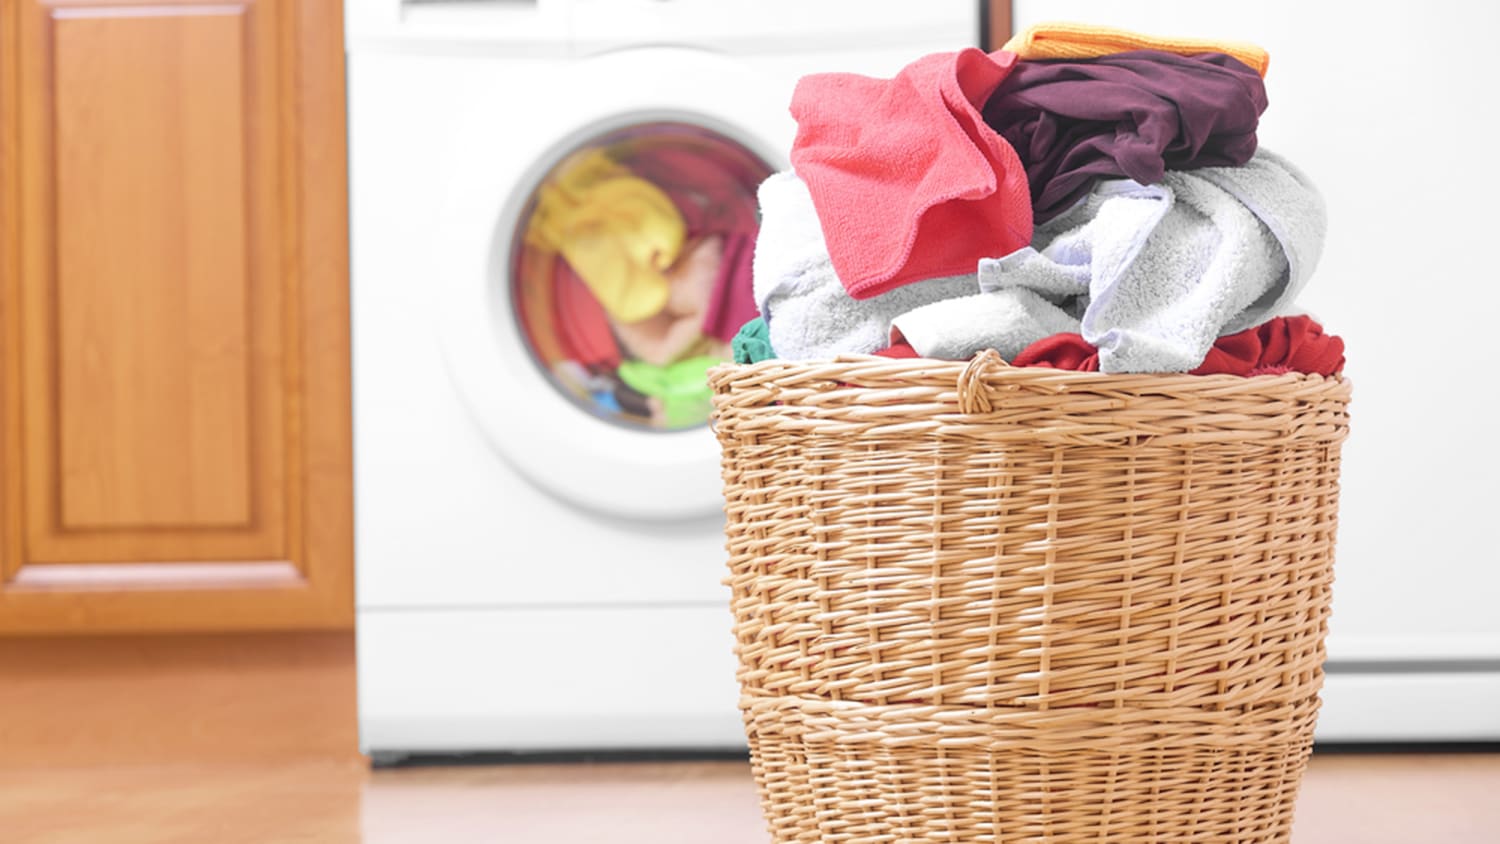
Water recycling is a technique that should be embraced by all households and hotels as well. A lot of water used in households can be treated and reused to serve another purpose. To achieve this, you will need to get a greywater diverter. This device is used to recycle water that is used to do laundry, showering or even dishwashing. This water is then stored in a vessel where it can be used for various purposes such as watering the flowers, your lawn. If you intend to recycle water, be sure not to use soap or cleaning products that have very harmful chemicals. Such chemicals pose a great danger to your flowers should you water them with that recycled water.


These devices have the intent of saving you some extra coin and saving the environment as well. However, in all honesty, these devices will be a futile effort if you yourself don’t embrace the culture of water conservation. These devices are meant to regulate how much water is used but it’s up to you to ensure that minimum water gets wasted. Insist to your kids the importance of water conservation. Natural resources such as water are getting scarcer annually and it’s about time people learned how to use water sparingly.


The post Water Saving Home Devices That You Can Install Yourself appeared first on Cleaning Exec Cleaning Services.


from
https://cleaningexec.com/blog/water-saving-home-devices-that-you-can-install-yourself/

Unique Ways To Decorate Your Kids Room With Washi Tape.

Washi tape is a durable tape used for decoration and crafting purposes. It originated from Japan and has gained popularity around the world. The tape has the advantage of a diversity of styles, making the creative options for your kid’s room. Some of the washi styles available include thick, thin, semi-transparent, patterns galore and pastels. Additionally, it easily peels off easily when stuck to walls. Therefore, you do not have to ruin the walls in your kid’s room. Considering the variety of styles available, there are various interesting and fun ways to decorate your kid’s room.

  1. Make the door amazing to look at.

Transforming the door can give your kid’s room an aesthetic appeal for passersby. Considering kids usually keep their rooms out of bounds for people, transforming the door using washi can give incentive to the kid to be open to visitors. Some of the transformations include creating designs resembling a portal, especially if the kid is into fantasy art. The theme for the door should be similar to the kid’s interests. This will make the room special to the kid since it will carry his or her personality. It can be a bonding experience for the kid if he or she is also involved in the decorating process.

  1. Make picture frames for pictures.

Many people have pictures on the walls of their kids’ rooms for decoration. These could be greatly improved using washi tape. A wall of the picture can receive improvements and create more focus with embellishment using washi tape. The tape can draw attention to the picture. Some of the options for picture frames include buying cheap picture frames and using washi to decorate them and making them look more appealing. It is cheap and easy to make. It does not cost too much to improve your kid’s room if you use washi as decoration.

  1. Use washi as decorations.

The easiest and interesting way to use washi tape is to use it as wall decorations. This gives a variety of creative options. The wall designs could range from geometric shapes to shapes of animals and other the child learns in class. The shapes could also resemble the shapes of the kid’s favorite animals such as lions and giraffes. The biggest advantage is that it relieves someone from the commitment associated with wallpaper, which can be hard to remove when pasted on the walls. In addition, you can change the washi designs to the theme best suited to the child’s age.

  1. Washi Tape as filling for wall art.

Some wall art can have blank areas that do not have content, thereby making the art bland. Adding washi designs can make a regular wall art look remarkable. It can be a good way to change cheap works of art to very appealing art for your kid’s room. In addition, someone can use the kid’s work of art created at school or at home as the art to decorate using washi. Making the decorative process a bonding experience between you and your child can be an enriching and bonding experience.

  1. Washi tape as a photo display sticker.

Families usually have many photos in their albums that are not displayed anywhere. Washi is a useful material to use for displaying memorable photos on walls. The photo display on the wall can make memories more visible to people who come to the room and the kid, thereby helping the kid remember memorable events.

  1. Projecting and creating wall art using washi tape.

Another option of wall designs is using washi tape to create imprints of favorite pictures and silhouettes on the wall. This involves using a projector and pictures, especially silhouettes of figures such as animals, people, and other objects. Project the photo onto a wall. Then, cover the picture or silhouette with washi tape. Finally, following the outline of the projection on the wall, cut out the excess washi tape to reveal the photo or silhouette’s outline. Within a few minutes, you will have beautiful wall art that looks professional. It could be an interesting exercise in art and craft that is rewarding.

  1. Making hand and other prints using washi tape.

Image result for tips for making prints with washi tapes

Making prints is an easy but interesting process. For example, you could create hand and footprints for sticking on walls. Trace the hand or leg of both you and your kid on a piece of paper. Use washi tape to cover the hand and leg prints, remembering to cover past the outlines. Then, use a sharp knife or scalpel to remove the excess washi tape to remain with the outline. To make the outlines visible, use the cardstock material as the print. After removing the excess washi tape, you will have adorable prints of both your hand and/or leg prints. You can hang this side by side on the wall.

  1. Create space for hanging documents and other things for your kid.

Children usually have small drawings or other scribbles that they make during playtime. You could use washi tape to hang these on the wall. This can act as your kids’ workspace. In addition to being a fun activity, it could also help your child learn how to be better organized in future. It is a learning and fun activity that could prove useful later. It can also reduce clutter and help preserve the things that the kid creates. It is a memorabilia of sorts. Also, this is useful for adult workspaces. Rather than using holes drilled on the wall or other destructive wall hangings, adults could use washi tape to hang notes and memos at the office or at home.

  1. Using semi-transparent washi tape on light fixtures.

Interior lighting can have only one bland and uninteresting color when bought at the store. Using semi-transparent washi tape, someone can decorate a light to make the light more interesting. When a room has multiple light fixtures, washi tape can be used on one light fixture as a decoration while the other light fixtures provide the needed lighting.

A little touch in your kid’s room is all they need to feel as part of the rest of the house. You can have your designer if you are not good at DIY, to come in and do the work when they are away. This is a good idea especially when you want it to be a surprise to them.


The post Unique Ways To Decorate Your Kids Room With Washi Tape. appeared first on Cleaning Exec Cleaning Services.


from
https://cleaningexec.com/blog/unique-ways-to-decorate-your-kids-room-with-washi-tape/

Unexpected Ways That You are Harming the Environment At Home

People think that they know so many ways to reduce carbon footprint, like walking instead of driving, turning off the lights, and also using the reusable bags that are found at the grocery store. Instead, there are so many daily basic ways that you use not knowing that you are hurting the environment, this seems to be small, but they can damage the environment in a big way. You may not know how to limit everything or even try to focus on some of the small changes that can bring big impact.Below are some of the unexpected ways that are harming the environment at home.

Antibacterial Soap

Image result for antibacterial soap images

We are always advised that we should stop using the antibacterial soaps; they are known to be the significant factor in spreading antibiotic-resistant or the superbugs, and this is very bad for the environment too. In most antibacterial soap there is this active ingredient called the chemical triclosan, which is used to create dioxin when exposed to sunlight and also chloroform, which it continues to build up the environment. This was detected after the sewage plants were treated, these services discovered in the streams and other sources of water bodies by the United States geological service. When once it is in the environment it can cause algae’s ability to perform photosynthesis.

Using Chemical Filled Product

When using the chemical household product they also harm the environment in so many different ways, whether you are using them in the air by spraying or poured into the drain, seeping them into the water system. This action affects both the indoor and outdoor air, leading to air and water pollution, it also has a toxic and reproductive effect on the species which leads to affecting the water that we drink, damaging the precious ecosystem and the climate change too.

Feminine Hygiene Product

This causes multiple hygiene danger to your health and the environment too. According to the research, each sanitary pad contains to about four plastic bags. This has revealed that this plastic bag contains chemicals which include substance like BPA which is known to disrupt the embryonic development and also increases the risk of several types of cancer. Not only the dangers in our bodies but also to the environment as well. Women have been using sanitary care product for such a long time over a thousand of years. This plastic waste like the sanitary pad and the pesticides have leached into the environment


Laundry

Image result for laundry images

The laundry detergent that is being used annually contained a lot of chemicals that we come contact with. This chemical not only do they damage our health, but also they harm the environment and contaminating the water source. Science has discovered that the laundry detergent concentration of only 2o% can cause fish to absorb the total amount of chemical that they would ordinarily absorb. This chemical accumulation of our compounds, waterways and the groundwater which has created a negative effect on our wildlife and enviroment.


Cleaning up dog poop

It is not hygienic to leave your dog’s poop lying around, but instead, you should pick it up using a plastic bag,  which is very good and many pet owner does it. It was reported that in 2012, 78million dogs in us were creating 10million ton of feces each and Avery year. If everyone would use a plastic bag to pick it all up, Well, there would be a lot of plastic bags lying in the landfill. 4% of plastic bags of poops were found in San Francisco’s as much as that in the city’s disposable diapers. It is recommended that you should use the biodegradable dog waste bags for a healthy environment.

Using Bleached Coffee Filters

People think that by using coffee filters and later thrown them straight into the compost bin, they can’t cause harm, but only if you use the bleached type. This can cause significant damage. Most coffee is bleached using chlorine, and also they contain dioxins, which in other term are called toxin. They are also made using the un-recycled paper which is easy to fix. However. You can choose to use brown filter paper that is recyclable or even reusable stainless steel. This will keep the environment clean

Getting The Latest New Tech Gadget

A lot of people are used to have latest new tech gadget. It doesn’t matter if you change the last version in a minute; they do line up to buy the latest and greatest. But it is a huge problem when it comes to the environment. The only thing that happens to this old gadget is that they are thrown away. It was discovered that in 2012 the group of organization reported that 48million tons were found thrown away in every single year. Even if you recycle the entire gadget, still they cause harm to the environment.

Eating Farmed Fish

Farmed fish are dangerous to eat for your body and also the environment. The food that these fish are feed on contains antibiotic and so many other drugs. Meaning that foods that are not eaten by the fish they always drop into the bottom of the water and later on dissolves. Fish also have algae that develop to red tide, and this causes harm to other species

Flushing Habits

Flushing Is one of the easiest ways that harm the environment every time. Sometimes people can flush things like tampons, applicators and different types of wipes, not knowing that they don’t dissolve like the toilet papers, but instead, they settle there. This creates a lot of damaging in the environment because they cause blockages that lead to destroying the sewer leaks, even if you flash twice or less than that.

It can take a month to form a habit, and many of us use that habit to destroy the environment slowly.  People do not trash the environment willing, but you find that almost every one of us carelessly litters cabbages now and then. Leaving lights and appliances on unnecessarily or even fail to insulate a home which leads to pollution of the enviroment.


The post Unexpected Ways That You are Harming the Environment At Home appeared first on Cleaning Exec Cleaning Services.


from
https://cleaningexec.com/blog/unexpected-ways-that-you-are-harming-the-environment-at-home/

Things In Your Home That Could Be Making You Sick

When you think about things that could make you sick, the first that come to mind are probably packed airplanes, escalator railings, grocery cart handles, door knobs and the like. While those things can be full of germs and disease, there could be threats we don’t even think about that are even worse, and, right in your own home.

From microscopic bacteria to hidden mold, dust mites and all sorts of toxins, it’s important to be aware how your home may be putting you and your family’s health at risk so that you can do something about it.

  1. Hidden Mold

Image result for hidden mold images

Mold is very common in homes and can grow anywhere indoors where there is moisture. It tends to build up quickly on drywall, wallpaper, and wood, as newer homes are sealed for energy efficiency and serves to lock in moisture which exacerbates its growth. According to the Centers For Disease Control, scientific research has linked indoor exposure to mold with upper respiratory tract symptoms, cough, and wheezing in otherwise healthy individuals. Asthma symptoms may worsen in those who suffer from the condition, and mold has also been linked to allergic reactions in one in every three people, and respiratory illness in children who are otherwise healthy.

If you notice a faint musty smell, any indications of discoloration, peeling or water leaks, or, you or someone in your family is frequently fighting off symptoms like dry eyes, sneezing, coughing or rashes, it’s time to deal with the mold yourself or to call a professional into your home to check for mold.

2. Your Household Cleaning Products

Household cleaning products tend to be packed with chemicals, yet according to the EPA, just 7 percent of the top selling products for cleaning the home make that toxicity information available to the public. Ingredients in these common household items have been linked to asthma, reproductive disorders, hormone disruption, neurotoxicity, and even cancer. If you use them, the air in your home is likely to be more polluted than the air outdoors. While manufacturers argue that in small amounts, the toxic ingredients in their products aren’t likely to cause any health problems, but when we’re exposed to them on a regular basis, it adds the body’s “toxic burden.” That toxic burden refers to the number of chemicals stored in the body’s tissues at any given time, and can eventually cause enough harm that it triggers a disease to develop.

Instead of using these hazardous items, look for natural alternatives like vinegar combined with water in a spray bottle. Baking soda is abrasive, so it makes a great natural scrubbing ingredient as well.

  1. Can Opener

Image result for can opener images

Most people open up a can with their can opener and then just stick it right back in the drawer. Over and over again, sometimes for months or even years. But according to NSF International, a nonprofit public health group which analyzed 14 common kitchen items for the presence of four different types of microorganisms in a 2103 study, it could be a gathering spot for salmonella and E. coli. Mold and yeast were also found on some can openers, which are known to cause problems in those with allergies. Before you put that can opener back in the draw, hand washes it in hot, soapy water, making sure all food residue is removed, or, run it through the dishwasher.

4.Kitchen Blender

Image result for kitchen blender images

If you don’t clean out your blender after every use, you could be inviting all sorts of microorganisms into your body, including E. coli and salmonella. NSF International advises taking it apart after every use and thoroughly cleaning it before putting it away. That means disassembling the entire jar base and putting in the dishwasher or washing everything in hot, soapy water. The blender’s gasket, which is a rubber seal at the base of most blenders, was found to be the third most germ-infested item in the home in its 2013 study.

5. Refrigerator Compartments

Image result for refrigerator compartments

It makes sense that the refrigerator can harbor all sorts of germs, with decaying, moldy foods often kept inside. While you probably scrub it out occasionally, many miss the bins meant to hold meat and produce, which are the worst areas of all. They’ve been found to contain yeast, mold, listeria, E. coli, and salmonella. Regularly remove them and wash them out with hot, soapy water. If your sink isn’t large enough, use the bathtub or a hose outside during the warmer months of the year.

6. Your Central Heating and/or Cooling System Vents

There are a few potential health hazards that come with central heating and cooling systems. According to the EPA, while a little bit of dust in the pipes is normal and typically harmless, sometimes mold and other potentially hazardous debris can build up, causing some serious health issues. If you become ill or are suffering from allergies suddenly for no apparent reason, this could be the problem. Experts say that if your pipes become contaminated, it’s important to remove the offending debris as soon as possible. The EPA advises that anyone with mold covering more than 10-square-foot area contact a mold removal specialist.

Another issue related to central heating systems is that it can cause problems with the natural oil gland in your eyes, drying them out, which can result in eye infections or frequent coughing at night. Installing a humidifier can help.

7. Vacuum Cleaners

Does your vacuum have a HEPA filter? If not, it could be putting you at risk for a host of nasty bacteria and microbes that can sneak into your system, triggering allergies and negatively impacting your breathing. The dust from the vacuum also contains antibiotic-resistant genes that may result in lung damage over time. A HEPA-like filter doesn’t do the trick, according to Jeff May, author of ‘My House Is Killing Me!’ as when you vacuum, the cleaner sucks in air and then filters the dust and expels the air, but if the filter isn’t really collecting the dust, that means you’re simply releasing particles into the air.

8. Plumbing Leaks

If you don’t see any damage or sign of any other issues, you may think a little leak isn’t a big deal, but it’s not something you should ignore. Even if you don’t see it, water damage, bacterial and mold growth can start to develop within just 48 hours from the time the leak begins. Moisture in the home has been associated with all sorts of health issues, and a damp house has been proven time and again to cause respiratory illnesses and many other concerns. The director of the Clean Air Program at Oklahoma’s University of Tulsa, Dr. Richard Shaugnessy, has noted: “Moisture in homes has been identified again and again to be associated with respiratory problems and other detrimental health to people within homes. There’s mold, there are bacteria, and the dampness is more conducive to having more pests in the home.”

9. Carpets

Of course, there are times when our carpets are obviously dirty, it can happen so easily, but what about when that pricey, luxurious carpet looks spotless? If it’s brand new, it’s a major source of volatile organic compounds (VOCs), which may include highly toxic chemicals like formaldehyde, a well-known human carcinogen. It’s been definitively linked to both throat and nose cancer and is known to cause chronic irritation of airways and the throat that can potentially lead to a dangerous infection, asthma, frequent nosebleeds and other respiratory problems, according to the U.S. government National Toxicology Program. Those risks are even higher in infants, the elderly and those who have a compromised immune system.

A carpet that’s been in the home for any amount of time, even if it does appear flawless, is harboring dirt, dander, bacteria, and other irritants. When those irritants get into the air you breathe, they eventually enter your lungs and cause problems.  Once a carpet has accumulated irritants, it can lead to skin conditions, respiratory issues, and potential mold growth. Be sure to have it cleaned professionally on a regular basis, or consider removing it altogether.

There are more things that coould be making you sick in your own home but the above are just some of the most common ones.

The post Things In Your Home That Could Be Making You Sick appeared first on Cleaning Exec Cleaning Services.


from
https://cleaningexec.com/blog/things-in-your-home-that-could-be-making-you-sick/

Monday 16 April 2018

Useful Tips For Photographing Your Home.

Who wouldn’t want to see their homes showcased in those fancy home magazines or have everyone on your social media platforms pleased to like and share your home? Well, it doesn’t mean that you live a little less good than the ones whose homes keep looking spectacular for home magazines. It just means that you might not have the skills of a good photographer. In as much as your selfies look great, your home is different and needs attention to detail. The below tips will help you achieve what you always imagine of your home.  They will make home photographing not such a mystery any more.

  1. Invest in good camera.

Image result for great camera images

No matter how good your house may appear, it needs a little boost from a good camera. You do not have to break your bank just for a day or two of taking photos. You could have the alternative of borrowing from a friend or hiring one which will be a lot cheaper than purchasing one. Your smartphone could be taking clear photos yes, but a good camera will go a long way.

  1. Concentrate on lighting.
  2. Image result for beautiful lighting fixtures for the home

The best lighting your home could have is the natural light. Focus on the area of your house where there is natural lighting like next to a window or directly opposite to the window. If the lighting in your home isn’t that good, invest in sheers as they are very good at reflecting light.

  1. Clean your house first.

A photo is the exact replica of the image it displays. You cannot take a photo of a dirty place and expect a photo of a clean house. Clean and clear any mess first before taking a photo. Make sure your home is clutter free. If you are looking to rent out your home as an inn, or put out your place in an ad, then it is better to have a clean photo that will depict a relaxing environment.

  1. Have a center of focus.

It is not necessary for you to have a photo of your entire house. Select a corner in one of your rooms specifically the sitting room or bedroom depending on the purpose of the photo. A good idea is to get a professional to stage that area for you so that it can appear eye-catching. Let your photo be the one to tell the story about your home. You could use artificial lighting for a perfect place that has no natural lighting.

  1. Get rid of the background distractions.

Not every piece of art, furniture or hanging should be included in the photo. In fact, the photo should only have whatever you are trying to showcase with just one more piece. In short, your photo shouldn’t be too busy as it might have some element of distraction to the viewer’s eyes. Look for things like too many books on the study table, utensils from the dinner table or too much wall paintings. Your tables and shelves should be clear of anything that is not meant to stick around during the  home photography session.


  1. Find your point of interest.

There are that one or two things that are the reason for your photography. Be keen on it and try and enhance its beauty. If you want a photo of your face, for instance, you have to add a little touch of makeup just to enhance your appearance. The same case applies to home photography. If you are focusing on the dining area, add something like a single flower vase on top of the table of course with a table runner beneath it to make it look welcoming. You could add a few throw pillows on your couch if it’s the center of focus for you.

  1. Seek advice from a professional.

Image result for professional photographer images


Professionals know how to do things better as it is in their line of work. Seek advice from a professional so as to know how you will prioritize your angles. Not all angles are to be included in the photo no matter how pleasing they are. Prioritizing your photos and arranging them in that manner will create an understanding of the viewer.

  1. Do a little décor.

You can choose to have some little bit of time to do some slight décor before the photography. This includes changing the color of your curtains, putting up a wallpaper, substituting your lights with brighter ones or even some few fixtures here and there. All this is for the benefit of achieving good results.

  1. Take sample photos.

You would not know how your home may look like on a photo and you might probably concentrate on one area leaving out a better one. The best way to avoid this kind of scenario is to take photos of every corner of your room and lay them down to access the best place of photography. This will also save you the time of having to stage each area just for a shoot that will not be used.

  1. Have some fun.

It is a professional photo, no dispute in that but also have some fun while doing it. It is a good experience to have time ‘bonding’ with your home as well. This might even give you some decorating ideas which will bring a whole new and improved look. Don’t be so uptight and be willing to learn and get a few tips from your designer as well.

Wouldn’t you have that satisfaction of achievement when you see your home online and clients buzzing over it just to have a taste of the real-life experience in your home? These tips will really come in handy for you as you go about posting your home online for an advert. Do some research on the home magazines and get to see their photos just to have an idea of how to display your home as well. This should be a wonderful and learning experience for you as you go about marketing your home.

The post Useful Tips For Photographing Your Home. appeared first on Cleaning Exec Cleaning Services.


from
https://cleaningexec.com/blog/useful-tips-for-photographing-your-home/

Too Many Kids At Home How To Keep it Clean

If you have a messy house it means that you have kids living and loving life and that is a good thing. It is possible to maintain a clean house with kids. Here are a few tips on how to get about it. Let’s get started.

Image result for kids cleaning the home images

Routine

Start doing the routines while the kids are still very young  because this is the main reason why people do the daily routines. This is important if you want to keep your house clean and organized. You cannot spend all the time cleaning the house because you need time to spend with the kids as well. For example, go to the movies, go to the playground read books together and have fun times together. It’s highly recommended to get dressed first after waking up unlike working in your bedtime clothes because you tend to do the tasks faster. Routines reduce the tasks from being an overwhelming mess.

Regularly get rid of things that you and your kids do not use or need

Image result for kids cleaning the home images

Learn to get rid of things that you don’t like, need or use and you will be surprised how much space you will have. After a while, you will notice what your child doesn’t need or use anymore. The best times to do this are before their birthdays and Christmas because you are going to get more clothes more gifts coming in. So it is a great chance to get rid of the things you are not using.


Have  a regular clean day routine

Image result for kids cleaning the home images

This is great to do before a nap or before going to bed. Have your children put away everything before going to bed, give them a ten-minute warning. For the smaller kids who do not understand what ten minutes mean, use words like in, “a little while “for them not to be hesitant.

Take laundry, for example, have a hamper where they throw their dirty clothes in their room. This should happen when they change their clothes, they should not leave the clothes on the floor. Dishes should be put away after dinner, lunch breakfast is done and no dishes should be let to sit. Let the kids handle the little plastic containers when they want to help with the dishes. Kids often times want to help.We should always give them a chance to and have a little patience, encourage them while at it and have fun as well.


Make tidying fun

Put their favorite music that plays especially for the specific time for cleaning up. Set a timer and tell them we are going to stop cleaning when the timer goes off. Make it more fun and interesting. Break down the roles of collecting all the blue colored toys then all the green colored ones then finish up with the red ones. This will make it less overwhelming for them.


Make things easy to put away

Make the toys more reachable to the kids. Do not make it complicated. Have bins where everything goes.

For younger kids have a picture of what needs to go in the specific bin because they do not know how to read. In this case, they will know where everything belongs. In that way, it will be easier for them.

Set a timer

Using a timer is great for both you and your kids. For you when you are doing your morning routines if it’s cleaning the bathroom, making the bed, you can knock it all off in fifteen minutes depending on how fast you are. It is great for your kids if  you tell them how much time they have on the task and they are going to hurry up and they will be done in a short time.

Another good way of using a timer is when the child knows that when the timer goes off its time to play with their parent so they will be looking forward to this times. This is such a great idea with your kids.

Put things away before you get another task out

Get in the habit of making the kids clean up after the current task before moving to the next. They will get into the habit of doing this until it becomes a rule.

Put a basket in their room

Put a basket in their room where all the little things go in. Things that they get from their Sunday school or gift wrappings. If they are in school they also get little staff that they collect these things end up as clutter.


Take pictures of your kids with their school project

That way you can get rid of them. When they are younger they would want to keep them for longer. Keep scrapbooks of the project and show them when they group up as an alternative.


Give rewards

Children can be rewarded for the efforts they make towards keeping the place tidy or cleaning up after playtime around the house. Rewards can be given in forms of gifts or points on other benefits like candy. This is positive re-enforcement and they will always make an effort of picking after themselves keeping in mind that it is rewarding.

Creating Designated play areas

Space for play doesn’t have to be plenty. Specific areas in the house can be selected to be play areas and the children are allowed to only play in those specific areas. This, however, needs discipline as children have a tendency of sometimes not really listening to specific instructions so a clear explanation and emphasis is important to be explained to the children to have them understand the importance of having those play areas specific to playing.

This limits the toys to specific places in the house, therefore, making it easy to clean after them after playing hence keeping the house clean. Play areas also don’t always have to be just indoors. Children may be encouraged to play outside if there is enough compound space close by. That way the house doesn’t always have to be littered because the kids are everywhere


The post Too Many Kids At Home How To Keep it Clean appeared first on Cleaning Exec Cleaning Services.


from
https://cleaningexec.com/blog/too-many-kids-at-home-how-to-keep-it-clean/

Tips For Hiring A Pest Control Professional.

Getting rid of pests can seem like a really easy thing if the problem is not that serious. In some cases, the damage may be so severe forcing you to consult a professional. Other instances that might result in having to get a professional is when you have to use pesticides that can only be handled by a certified pest controller. Getting that professional is not easy like a walk in the park as you really have to be careful with who you choose and their experience among other factors to consider. Here are some guidelines to help you through the process of hiring pest control professionals.

Image result for pest control images

Before you settle on the technician, get to look at his documents such as his identification and the validity of his operating license. That is what will show you how reliable he is since an up to date license proves that he is current on his training. A professional will always have a report on the service undertaken, any prevention remedies and follow up appointments if need be, soon as he is through with his job. This should be followed by an invoice.

Go for a technician that has many recommendations on his website if he has any or rather you could ask your friends to refer you to a good technician. If you do not have any means of doing so, ask to see a portfolio from the technician you have gotten and follow up on one or two of his customers. This will assure you of his work and how professional and thorough it is. This way you will hardly experience disappointments afterward.

  1. Be keen on the safety of the chemicals used.

Image result for pest control images

Before spraying any pesticides in your home, enquire what chemicals your technician is using and get to know the following:

  • What exactly is contained in that chemical?
  • Have the chemicals been tested and approved by the state?
  • Are they effective in eradicating the pests at hand?
  • Can the chemical leave traces that might have a long-term effect on your health?

All that will help you in deciding whether or not you will go for them.

We always have everything on a budget. Even for issues like pests, you shouldn’t have to break your bank for you to enjoy the service. On the other hand, a very low pricing might also mean poor or no results. Get a professional that will take you through their pricing system, either quarterly or annually depending on how affected your home or office or whatever area you want pests eliminated is. By that, you are able to set aside the funds to cater for it without overstretching your financial ability.

  1. Do due diligence on individuals.

Opting for an individual as your pest control technician is a bit of a risk. You should, therefore, be extremely cautious about this. Take time to know their background, have their credentials and scrutinize them keenly before allowing the technician in your home. Also access him personally, his overall, his mode of detecting pests and his confidence in recommending the solution to the problem and how effective it will be. Also, have everything on paper including a contract.

  1. Seek advice from your technician.

Once we notice of a pest problem, we always want it solved immediately. As much as pests are a nuisance, we should take time and get some sound advice from our technician. It is not a must that chemicals be used at the site of pests. The pest controller could have other alternatives that do not necessarily have to involve chemicals. They should also give you any preventive measures to avoid the pests from coming back.

For long-term services, it is advisable for you to get a fully detailed contract which includes information such as the duration of the contract, how many visits it will take during that duration, cost, duration of the guarantee after the service and other terms and conditions of the service. Be sure that the contract also covers you in instances where the service might be ineffective and have it signed and stamped with both you and the company. Read it carefully so as to understand before signing.

  1. Get prepared for a temporary stay.

Some technicians may advise that you get to leave your home for a week or two as they do the job. You should be ready with plans on where to move your family for the time being with finances to cater for your stay at a motel or at a relative’s place. This will make sure that you don’t get overwhelmed on the last minute in terms of having to move your valuable items out of the way as well.

  1. Do a survey of your own.

You could think that your house is the only place that pests have invaded. Yes, it is the work of the technician to get to know the source of the problem but at times they may miscalculate. The advantage here is that you know your home and it’s surrounding better than he does. Take time to look around the area and have it down so that you can also guide your technician on where the pests might have originated from since pests like to hide during the daytime.

  1. Try home remedies first.

Before consulting a technician, you might want to try one of those home remedies for getting rid of pests. Inquire from neighbors with a past experience of the same. The pests might be too many but the remedy to get rid of them can be so simple.

As long as you get one of the above tips and use it, you are good to go. Keep your entire surrounding clean, clear any stagnant water and get rid of any mess before it turns out to be a feeding hub for pests. Be sure to also clean the dark areas of your house as you do your chores just to counter check of any signs of inhabitation. As they say, prevention is better than cure.

The post Tips For Hiring A Pest Control Professional. appeared first on Cleaning Exec Cleaning Services.


from
https://cleaningexec.com/blog/tips-for-hiring-a-pest-control-professional/

Monday 9 April 2018

Tips for cleaning a painted wall

Remember that moment when your kids proudly run to get you to showcase their artwork on your wall? Albeit it is the same moment you try to balance between a smile and a cry for help. You start wondering how you are going to get the crayon marks off without messing the paint, and leaving it that way is not an option. Well, today you are in luck; all you have to stress about now is how to know whether the drawing is a giraffe or a lizard. Generally, whether you are a parent or not; it is vital for you to know how to clean your walls.

Stains happen, they are part of life. And again, you might shift to a new home and don’t have the resources to renovate, cleaning the walls will hugely help improve the look. With that said though, there should be a fine line between knowing when to renovate and when cleaning is needed. Good news is, paint is very reliable and long lasting. Therefore, it is a healthy habit to maintain it. Prevention is better than cure; so, if your walls are still in a good state, ensure to keep it that way. Don’t wait until they scream ‘wash me’, simply act on stains as soon as they happen. Knowing how to clean your wall literally puts you a step forward than most people, it’s an important yet a much-underrated task. Here are ways you can show some love to your walls.

Dust the walls

Image result for dusting the wall images

This is the first thing you do before involving water and a cleaner and actually, the easiest way to restore your paint job. If your walls are not in a bad condition, just vacuuming the ceiling and walls will cut it. While vacuuming is the most popular method, there are alternatives that you can choose from. You could use a microfiber cloth to wipe, a mop, a lambswool duster, or a broom covered with a towel. Before you start dusting, remember to cover your furniture and if possible, pull them away from the wall. There are various patterns of dusting that will get the work done. You can try moving along the wall in a ‘W’ pattern. This is where you start at the top of one corner, then move down and over, then up and over in a continuous motion. Nevertheless, choose the one that suits you best.

Take care of stains

Image result for Stained wall images

After dusting you can now introduce water and detergents. However, instead of washing the entire wall (which may be very unnecessary) or work blindly, it is best to start with stains. Deal with them individually. It’s not rocket science to know what works for crayon stain will not do it for grease and oil. Here are some ways you can deal with some stains:

How to remove crayon stain

Related image

Removing crayon stain is actually easier than it looks. Moreover, there are so many ways you can carefully take care of the stain. Some of the methods are so easy you will hardly require any elbow grease. For instance, simply rub some mayonnaise on the crayon marks. Come back after a few minutes and all you’ll have to do is wipe the wall with a damp cloth. And hurray! Your wall is spotless. Alternatively, turn to your all-purpose cleaner, vinegar. It is one of the best ways to remove crayon stain. The acid in it breaks down both the wax and pigment components of the crayon. You can use your blow dryer or disposable cleaning erasers.

How to remove grease and oil stains

Image result for grease stained wall images

Oil stain is as damaging as other stains; in fact, it can degrade your wall so bad making it look very ugly. The stain comes in contact with your walls in many walls. It can be just from body oil or while you are cooking it gets a splash, doesn’t really matter. Good news, any decent dishwashing soap can remove the grease stain. All you have to do is mix some dish soap and water, then wipe. If the stain is stubborn, you can make a mixture of vinegar, baking soda and a gallon of water. Wipe the solution over the walls with a cloth or sponge, and rinse.

Removing water stain

Leaky ceiling and basements mostly lead to watermarks and stains on your painted walls. They are very unsightly and can be very tough to remove. After solving the problem that’s causing the leakage, you can then take care of the stain. Create a cleaning mixture to rid the stain. Take a gallon of warm water and add a mixture of 1 cup of white distilled vinegar, ½ a cup of ammonia and 1 cup of baking soda. Clean the wall with the mixture using a clean cloth. If the damage to your paint is too much, you may have to cover it.

Clean fingerprints

Image result for finger prints on the wall images

If you live in a house, you can easily stain them with a touch of dirty hands. You will have the best results in keeping your walls rid of fingerprint stain as soon as they happen. With that considered, you will be grateful to always have a packet of baby wipes. They are designed to clean skin and will often break down the oils in fingerprints and clean them off surprisingly well. If the stain has set, you can make a mixture of ammonia and warm water. Using a microfiber cloth, use a circular motion to scrub gently. Then dry immediately after rinse.

Removing molds

Having mold grow on your walls is not only unsightly but also unhealthy, especially for an asthmatic person. Prepare for cleaning by removing the future around the affected place. Then wear protective gloves, goggles, and a mask to prevent breathing the fungi. Start by mixing water and detergent in a spray bottle. Spray the area and scrub the mold off with a rug. Next, make a solution of 1 part bleach to two parts water and spray on the affected area. Leave it for some time—bleach kills fungi, then rinse with a spray bottle with water. Dry with a clean towel.

Those are some ways you can keep your walls clean and stainless. Ensure to check on your walls from time to time, to prevent a tough time when cleaning later.


The post Tips for cleaning a painted wall appeared first on Cleaning Exec Cleaning Services.


from
https://cleaningexec.com/blog/tips-for-cleaning-a-painted-wall/

Smart Ways To Use Bleach At Home

Bleach is a great product for maintaining a healthy and clean home. It’s mostly used during laundry but you’ll be surprised at how much more it can do. It is one of those products you either love or hate. Some people are reluctant in maximizing its use due to lack of knowledge on how to use the stuff. Nevertheless, bleach can come in very handy in solving major common problems experienced in our homes. However, we can’t ignore the fact that some people have concerns about how safe it is to use bleach around children and pets. It is definitely safe but the best way to solve problems with bleach is by not making certain mistakes, otherwise, you can be assured of good harmless results.

For instance, you should never directly pour undiluted bleach on a stain or using a bleach gel pen which lets you target its bleaching power directly to the stain. Another mistake is not checking the care label for a white triangle which means its bleach safe. Regardless of your cloth being white, there are fabrics like leather or wool that don’t mix well with bleach. One other common mistake made is by not measuring bleach when using it. And, of course, it is no brainer to keep all chemical out of reach of children. Otherwise, when you use bleach well, it can do so much more than whiten your clothes. Here are smart ways you can use the product.

Sanitizer

Image result for bleach surface sanitizer images

Bleach is composed of a sodium hypochlorite solution, which provides a cheap and easy way to sanitize surfaces in your home. Additionally, it can deodorize at the same time. Although for you to use it safely, it must be diluted correctly. It should strong enough to sanitize and weak enough not to be too harsh. Sensitive places in your home, such as the kitchen and bathroom will really do with a cleaner that can double as a sanitizer and deodorant. Simply mix 1 gallon of warm water with a ¾ cup of chlorine and apply on the surface you want it cleaned. An addition of a detergent can be made but it’s not necessary. For a small mixture, such as to put in a spray bottle, probably to clean your toilet, simply add one and a half tablespoons of bleach to 2 cups of water. While cleaning, note that sanitizing with bleach is not instantaneous, but instead it needs time to set. Therefore, you can just sprite your toilet every night before you sleep and clean it in the morning. It will easily be clean without much effort from you.

In Washing Cutlery

Image result for washing cutlery images

By adding a little bleach in a basin full of water, you can easily clean your cutlery. If you have a favorite cup like me, you know how sad it can be to see it stained with coffee. Coffee and tea stains seem and are stubborn for just dish soap. therefore soak them in the water with bleach for a few minutes. Then wash as usual and rinse thoroughly. While due to its perfect results it may seem to have been manufactured only to take care of such stains, but it’s also good with your glassware. After cleaning them, soak the glasses in a light bleach solution. Rinse well and you will have sparkling glasses. This can also come through when washing windows. Simply add a little in the final water and watch the glass shine.


Removing Mold

Image result for Mold removal images

Mildew and mold are not only disgusting to look at but also pose harm to your health. Therefore, there’s the great need to remove it as soon as you sport it. Bleach will immensely help in killing the fungus. Frankly, both bleach and ammonia are perfect for the job but you should never use both at the same time. After you have wet the affected area, cleaned it with detergent and a disposable towel or wipe, you can then spray the bleach. Let it sit for 15 minutes then scrub with a stiff brush and rinse off. Ensure you thoroughly dry the place, especially if it is your window panes.

For Swimming Pool And Cut Flowers

Image result for pouring bleach in the swimming pool

Chlorine bleach has a beautiful way of keeping the pool water clear as long as possible, mostly during winter when it’s rarely in use. Simply add a 5-liter bottle of bleach to your swimming pool water once a month and keep your water crystal clear through winter. Then you can revert the water when summer or spring is around the corner. Using the same knowledge, a bit of bleach can be used to cut flowers. It helps in keeping the water clean longer.

In laundry

Image result for pouring bleach in laundry images

Bleach is commonly known for its effectiveness when using it for laundry. If you have a stain on a white cloth, simply soak overnight or for some few minutes then launder as usual. You will have a whiter spotless cloth.

Disinfectant

Before you start disinfecting garden tools and other stuff, you should start by cleaning them if they have a lot of dirt or organic materials. Failure to do so, the bleach will not sanitize properly. This is because it is deactivated by large amounts of dirt. You can use bleach to disinfect your garden tools at most once a year to reduce the risk of spreading plant diseases. When you want to reuse a flower pot, you can soak it in bleach to kill existing germs. Additionally, you can disinfect anything plastic that you have bought as second-hand.

Sterilize drinking water

For developing countries, with families that neither have the privilege of fresh water nor the resources to boil it, chlorine is a cheap and good way of sterilizing water. A half teaspoon of bleach to four gallons of water will be safe enough to drink.

Cleaning chopping boards

Bleach does a good job of cleaning wooden chopping boards. Butchers can really benefit when using bleach on their chopping board. All you do is pour the bleach and watch the stains disappear effortlessly. Although you should wash it again with a detergent and rinse it thoroughly before use.


The above are the smart ways you can use bleach in your home. After serving its purpose always keep it under lock and key.

The post Smart Ways To Use Bleach At Home appeared first on Cleaning Exec Cleaning Services.


from
https://cleaningexec.com/blog/smart-ways-to-use-bleach-at-home/

Reasons Why Your Home Decor Looks Anything But Cohesive

Many of us will enter into a friend’s home and will feel that we have jumped into a new environment. The home looks so good, it even smells better. When reality hits you about how your house looks like and you definitely notice the great difference even more. The difference is only the arrangement and decoration. So what causes one’s own arrangement to feel inferior down hearting oneself? Here are a few tips on why you may be doing it wrong compared to the friend above.

Color clashing

Image result for color clashed home interior images

This is the very common mistake made by many especially the men. Being a man you may have probably been accused a couple of times by a lady of being color blind. Clashing the color especially in the table room can make the even visitors feel uncomfortable when chatting. So find someone who will mix match the right colors for your home interior to create harmony.

Being a copycat

Related image

When decorating your home be yourself and do it to your liking and preference. The problem with most people is trying to make their home look like their friends or their neighbors. They end up making a huge mess of their home. Try and find and experiment with your own style that you will be proud of and find out how easy it is for everything to fall into place with no struggle. It also will give you a sense of belonging and pride when you sit and have friends around.

Inadequate space

Image result for a squeezed home interior images

The conception that having a lot of items defines your success is still a major barrier to décor cohesion at home. Having too many things makes it impossible to have a well arranged and decorated home. You will find places with two or three sets of furniture in a single room making it too crowded and difficult to move around. Even if you try your best to decorate it, you will find that it is still not appealing to the eye. It is better to go for quality than quantity. You can decide to have a single set to each of high quality rather than many low-quality furniture pieces.

Over-ambitiousness

This is a problem to those who often like to take in new concepts. They tend to have many photographs with them and try to have their home to look exactly like the photo. In the end, it tends to become worse than their original decoration. Others even try to blend two or three concepts hoping to bring out the ultimate but it hardly works as those are ideas from different people.

The imbalance between the new and the old

Some people may opt to go with a lot of old furniture and a few of the new ones or vice versa. Mixing furniture in such a way may create a confusing environment. It is preferred to go with a single way either use the modern furniture or the old. If you mix by any chance make them appear in harmony.

Furniture contrast

The contrast found in some houses among the furniture is another good example why your décor may not be in cohesion. Having every piece of furniture made of wood apart from a single metallic chair creates an imbalance in the house. The metallic chair will seem out of place and many people will avoid it as one will feel uncomfortable and in most of the case will be the center of attention around the room.

Inadequate lighting

Lighting in a home determines the mood of the atmosphere. Gloomy lighting may be viewed or associated with dull functions whereas bright lights can be associated with fun, enjoyable occasions. Make sure you light your house to the occasion. Let the lights in your house be a reflection of the occasion. The color of the light also plays a part in the cohesion of your décor. Choose the best color for you and make sure it gives just the right amount of light needed.

Inconsistent design style

Some people may think to have a different color or paint in different rooms of the home is a good thing. It may seem good but there is a feeling when you move from the living room to the bathroom then to the kitchen you are in a totally different world. The kitchen seems out of place as it does not match with the living room so does the bedroom and bathroom. It is advisable to try and come up with a major theme color to go all around the house. This also includes your flooring. It is advisable to have the same tile color across the house. You can still use different types of the floor like tiles and wood but make sure their color is in harmony.

Excess hanging art

People love to put up family portraits from antics they have acquired from trips and things that are just for fun like shells, animal horns among other things. They may be a positive addition to your décor yet still they can be disastrous. The antics are a symbol meant to signify something special but when they become too many they lose meaning and become as any other junk around the house. This is especially if you do not hang them in a specific place but you just put them up anywhere across the home. Try and have at least not more than five in a single room. You can hang your art the right way by choosing only a few relevant pieces.


We all desire our homes to have the perfect décor. When we take into consideration the aforementioned points we will have the home we all desire. Some of the points to consider are actually very simple to put into practice as they require no financial input. Let us try to produce that perfect outlook we all wish our homes look like rather than just admiring the magazine portfolio of the home decors we wish to have.

The post Reasons Why Your Home Decor Looks Anything But Cohesive appeared first on Cleaning Exec Cleaning Services.


from
https://cleaningexec.com/blog/reasons-why-your-home-decor-looks-anything-but-cohesive/

Living Room Centerpiece Ideas That You Should Try Out

Just as the name suggests, the living room is a place where you spend your most time relaxing or watching a movie. It is also an area where your guests see first immediately they enter your home hence the living room should be a center of attraction to both you and the outsiders. Here are some creative ideas which you can try out for your living room to have a lively look.

  1. Get bright colored curtains.

Related image

First and foremost, you should have curtains that enhance the brightness of the room to compliment on both the natural light and the bulb lights. You may choose to have floral sheers without any heavy curtain or have a floral sheer and a plain bright colored heavy curtain which you can draw during the day.

One big portrait at the center of the wall in your living room is the best idea ever as it becomes the focal point of almost everything. Get an eye-catching portrait. If you do not have any idea of a portrait that would best suit your living room, you could get some advice from the store. Make sure one of your couch faces the portrait so that you could also enjoy the view as you are relaxing.

Have a sizeable sofa, one that is not too big or too small, depending with your room size.  You can have it leaning on a wall that faces your main wall or put it at the center of your living room. Get a colorful sofa but be sure that the color matches everything surrounding it. Do not have the same colors in your living room to avoid monotony. You can choose two or three colors that blend well together and play around with them to create a perfect balance.

  1. Table design.

Related image

Get a glass table and make sure it’s thick enough to hold one or two ceramic decorations on it. You could also put a single flower vase on top. However, if you have kids around, it is better that you get a wooden table instead just to avoid incidences like falling on the table as your kids are laying around. Place the table in front of your sofa but not too close.

  1. Go for T.V mounting.

Related image

For your living room not to seem so overcrowded, you could opt for a T.V mount instead. It should be mounted right in front of your couch where everyone can have a view of it. Do not have it too high or too low to avoid straining your neck. Get an expert to do that for you just to be sure that it is safely secured on the mounts.

If you are a fan of fireplaces and your living room does not have one, you can create one for yourself of course by the help of an interior designer. You could have it just slightly on one side of your room. It doesn’t necessarily have to be at the center since you will have your television there. If you are not a T.V fun then the center of your house will be okay for you. Do not leave your fireplace bare. Decorate it with either photos of you and your family on top or some flower vase which would also look good.

  1. Create a formal sitting area.

Image result for formal sitting room area images

If your space allows, you could seclude an area like maybe just behind your couch and place single couches or seats and a small table at the center just for you and your friends to enjoy a good conversation. A vintage design of this would blend really well with your room. You could get a stand containing a few books to read or a bookshelf and make that place a meeting point for you and your book club members.

  1. Seclude a playing pen for your baby.

Image result for playing pen for images

Your baby or toddler shouldn’t have to stay locked up in her room while playing. You can have a small area in your living room and have baby friendly decorations, a rocking horse or whatever your kid loves just for her to feel like part of the family. Put up a few photos that she likes on the wall that her area faces. Secure that pace with a small picket fence just for it to look like her own territory since kids love being territorial.

On your centerpieces like the portraits and photos, get some small bulbs and place them beneath or above those items just for emphasis. The lights should be a bit brighter than your main light to create that theatre theme. Opt to go for different colors of lights but make sure they blend well to avoid color clashing. Do not however put so many of those lights around the house as you will be overdoing it. Just focus on the main attractions in that room.

Chandeliers are not only limited to dining areas or the kitchen or the wide hallway to your living room. Having a big and elaborate one at the center point of your living room’s ceiling will compliment every single piece in your room. If your ceiling is too high, get a low hanging chandelier to avoid one having to look up very high just to see it. Get one that is a bit higher if your ceiling is low to avoid knocking your head over it as you go around your house.

These are a few ideas to help you bring your living room to life. Make sure you use your space wisely. Do not overcrowd it or leave it so bare and plain. Balance everything up from color to the size of your furniture and lighting. Before beginning to decorate, go for more options so that you can comfortably settle on the most suitable one for you and your family.


The post Living Room Centerpiece Ideas That You Should Try Out appeared first on Cleaning Exec Cleaning Services.


from
https://cleaningexec.com/blog/living-room-centerpiece-ideas-that-you-should-try-out/

Monday 2 April 2018

Ways To Make Your Storage Cabinets More Space Efficient.

You may look at your cabinets and see that they are full. But take a closer second look. The problem might be that you do not know how to maximize that space that you have or even make use of it. There are better ways of storing your stuff without having to re-build your cabinets. You do not necessarily have to have a whole room as a pantry. Some of the ideas below will have you surprised on how much space you have been wasting.

  1. Arrange according to size and shape.

Image result for different sized items on shelves

Have items that are of same size and shape in one level of the cabinets to make sure that they perfectly fit. Putting different shapes of jars in one level may end up consuming a lot of space as they will not perfectly interlock with each other.

  1. Prioritize your items.

To avoid re-arranging your cabinet every time you want to get something, ensure that you have the most used items on the lower part of your cabinet and in the front line. This will help in keeping your kitchen always looking organized.

  1. Get organizers.

Image result for moving stuff in boxes images

These are big boxes found at the store and can be used to store very many things that when kept out in the open on the cabinets will tend to make the place look clumsy and unkept. However, their efficiency, try and arrange the stuff in there as well so that one box can accommodate a reasonable number of items.

  1. Get rid of plastic bags when storing dry food.

Related image

Organizing foodstuff in plastic bags or even the grocery bags will look so untidy and is not even healthy for you. Try putting things like biscuits, beans, or dried peas in mason jars to make the place look attractive and well managed. The best kinds of jars are the clear ones so you can be able to see what you can add to your next grocery list.

This may sound weird but having some small lights either underneath each cabinet or wherever you want to place them will be a good idea. This will make the place look more spacious. It is also a good way of avoiding any bugs that like crawling in dark places causing damage like cockroaches. The lights do not have to be too bright. Just have medium light bulbs.

  1. Keep your shoe boxes.

Image result for shoes in shoe boxes images

For the shoe cabinets, it is better that you keep your shoe boxes because they come in handy especially for the shoes that you rarely wear. Place those on the topmost shelf. Ensure that you clean that place from time to time to avoid accumulated dust.

  1. Add hooks for convenience.

Image result for Hooks in the kitchen for storage images

For items like pans, cake spatulas, and grill forks, you can choose to add hooks and hang them there instead of having them lying flat on the cabinets. The hooks should be placed in very strategic and safe places out of reach of children as the heavy pans may drop on them while they are playing around.

  1. Seek for extra spaces.

Image result for behind the door storage images

You can have your DIY shelves in other places that do not make the place seem too overcrowded like at the corners of your kitchen, behind or over the doors. Put a rubber stopper on the door to prevent bagging the door to the shelf.

  1. Opt for hooks in the garage.

Image result for hooks in the garage for storage images

Tools in the garage should be stored with a lot of caution as some of them are sharp and heavy. The best way to store them is by hanging them on hooks according to their use, size and how frequently needed they are. This is will ensure enough space for your car and your children’s bikes without having to knock any protruding cabinets over.

  1. Have inbuilt cabinets in your kid’s bedroom.

Image result for inbuilt bedroom cabinets images

To avoid clustering of clothes in one tiny place. You could think of going for beds that have cabinets on or underneath them. Things like toys and inner garments can fit there perfectly. Avoid places where you have to place things out in the open if they are not being used just to make sure their room looks spacious and not clumsy.

  1. Get pull down or sliding racks for smaller books.

The study room or ‘library’ can look very messy especially for the bookworms. The best idea here is to arrange your books in order on the shelf. However, you may choose to have sliding racks underneath your desk to store those small books or those with lesser volume.

  1. Closet Rods.

Image result for closet rods images

Closet rods ensures that you have a lot of hanging space. You may choose to add one more rod that can carry a few shirts, trousers or dresses either beneath your original rod or underneath it if space allows. Let the added rod have the same inches as the initial rod just to have uniformity.

  1. Place the medicine cabinet in your room.

Image result for medicine cabinet in bedroom images

This is meant for both safety and convenience. It is commonly kept in the bathroom with a mirror on the front. You can have a fast aid kit box and make a pullout rack on the side of it between the box and the wall. Do not place it very low where your kids would easily reach. You could even opt for a lockable micro-fridge in your room for medicine that has to be stored in there.


You wouldn’t have an excuse for not having to use up your space well with all those tips. Try as much as possible to be creative. If you have any difficulties in making your own shelf, you could call a handyman for help. Ensure that your cabinets are tightly fit to prevent incidences where the cabinet will fall off with everything in it. Get to know how many items you want in a cabinet to help you choose the right material to use when installing one.

The post Ways To Make Your Storage Cabinets More Space Efficient. appeared first on Cleaning Exec Cleaning Services.


from
https://cleaningexec.com/blog/ways-make-storage-cabinets-space-efficient/

Creative Ways To Spruce Up Your Home Flower Pots

Have you ever walked into a room and had your breath taken away? It happens. Live houseplants and flowers in a beautiful pot are always good for your home and will achieve exactly that. They add color and give off a good homely, natural vibe. Moreover, the scent and fresh air come as a blessing to your family and guests. Often, when we talk about decorating our homes, we can easily think of everything else than plants. Yes, many have disregarded the transformation a simple home flower pot can do. Understandably though, it might be because of the effort required to care for the plant. Regardless, you wouldn’t want to miss on the magic a home flower pot can do. Health benefits of houseplants and flowers aside, they can seriously step up the overlook of your home.

By just adding a few details to your home flower pots, you will have a breathtaking space. I have noticed that people (I included at one point) have home flower pots but feel there is something missing like it’s just not good enough. You want something that matches your personality and should be good for the flower too. Well, I learned that you can easily deal with that. Faced with a sea of choices and limited funds, I was down to using what I already had. And my pots were great; just felt too plain. Therefore, I looked for ways to spruce them up and you’ll be amazed at what I came up with. With spring in the air, you don’t have to re-pot your plants. Here are some creative do-it-yourself ways you can bring life to them.

Paint

Image result for painted flower pots images

Let’s get practical, after a neighbor springs for a new exterior paint job, it doesn’t take long for you to see everyone else standing out in front of their house with paint brochures and color swatches. Why? The answer is quite simple. A good paintwork can transform the appearance of any item in question by beautifying, adding character and personality to it. In the same way, you can transform your ordinary flowerpots into works of art with just some masking tape and spray paint. Before painting them, consider if the color will coincide with your existing décor. You can then take your plain pot and give it a new coat of paint. As you are at it, ensure that the surface is dry and free from dirt. Then apply a uniform coat of paint and let it dry. The paint should last for several years but if you are adventurous and love the change from time to time; just repeat the process. But you might consider removing the existing one before a new paint job.

If you want to make your pots even more decorative, you can use painter’s tape to create a two-toned pattern. Start by covering the rim of the pot with the tape, and then apply the first coat of color. Once the paint is dry, cover that part with a newspaper and the tape leaving the rim exposed. Go ahead and paint the rim with a different shade or color. After it has dried, remove the masking, and there you have a beautiful 2-toned flower pot. There’s so much you can do with paint; be open-minded and go for what the heart wants. It is about making you happy anyway.

Use fabric

Image result for fabric tied flower pots

Using fabric is a great way of transforming your plain pots into a colorful statement piece for your home by adding character and texture to them. There are various ways you can play around with your fabrics and come up with something uniquely beautiful. My favorite is covering it with fabric strips of different attractive colors. But you can, of course, go as wide as your imagination and creativity take you, as long as it’s visually attractive though. Basically, you will have to use some adhesive to the area of the pot that you need to be covered and place the fabric on top. Before using the fabric, you can paint the pot for it to coincide with the fabric if need be.

Use a knitted cover

Related image

For more uniqueness, you can have a knitted cover for your flower pots. You can choose a cover of different or same color. Knitting limits your pot to have one texture, regardless; you can have the cover knitted in different patterns. The upsides of having knitted covers are that you can have as many as you want since they are affordable and can easily get cleaned when they get dirty. This makes you pot look good and new as long as the cover is in good condition. It is as easy as eating pie.

Use glitters

Image result for glitter decorated flower pots

You can decorate your flower pots with glitter just to make them stand out a bit. I’d suggest you start by painting them first for a better-polished look. Glue the pieces to the bottom part of the planter in random patterns. Use a painter’s tape to get a clean line at the bottom.

Wrap a rope

Related image


Wrapping a rope around your planter is an easy way of transforming it in a classic way. You can wrap the whole pot with a rope or some sort of twine; yet to add the texture you can include a wrapping paper. All you have to do is wrap the planter in the paper and trim the edges. Then using a glue gun, attach the rope around the top half of the planter.

Use burlap

Image result for flower pots wrapped in burlap images

I personally love using burlap because of its simplicity that makes a big impact. Wrapping your pot with burlap and adding some ribbon can make your flower pots look really cute and elegant. It is quite easy to do and there are so many ways to embellish them. Just keep it simple by twine or jute to tie up the burlap. You can also use a chevron burlap ribbon and make a big bow for your pot.

There are so many ways you can add color to your flower pots. Incorporate some of the ones listed and watch the overlook of your space transform.


The post Creative Ways To Spruce Up Your Home Flower Pots appeared first on Cleaning Exec Cleaning Services.


from
https://cleaningexec.com/blog/creative-ways-spruce-home-flower-pots/